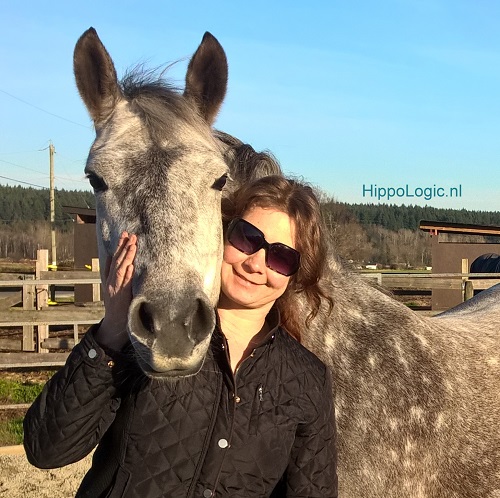
‘How do you implement clicker training under saddle?’, is a question many equestrians ask themselves. The answer is simple: the same way you implemented it from the ground. So, how do we start best?
First you have to learn the principles of Learning and Motivation, see this part 1 of this series. Step 2 is to set a goal.
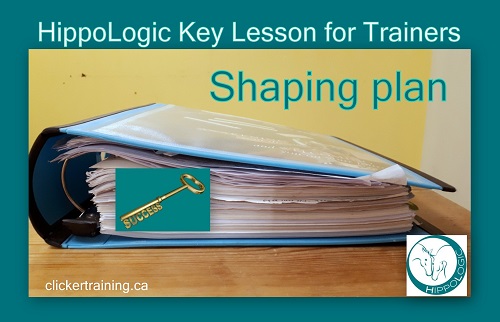
Key Lessons for Riders #2: Training Plan
You have to start with the ‘end in mind’: set a clear goal. The more clear your goal is, the easier it is to accomplish. When you have a clear goal you can divide it into smaller steps. Something that is very hard to do with a vague goal. Then it’s also easier to cross off each smaller step. That also feels really good: if you can cross off a sub goal. It keeps you motivated! So those are 3 valuable tips already: set a clear goal, divide it into smaller steps, cross off each step when accomplished.
Write your goal down in your Training Plan. Here are some more tips that will help you write your Training Plan.
Tip 1 For a Training Plan that actually works
Take a good clear look at your values! What values do you have and do they fit your goal? Maybe they don’t fit in your goal? It not, than you have to revise your goal.
Here can you find list of values, take a look and what values do you feel fit your way of horse training and horse riding? Some of my values that are important in my riding and training are are love, integrity, animal welfare, intrinsic value of the horse, honesty, skills and trust(worthy).
When I took my personal values into account suddenly it became clear: my goal to be an  competition dressage rider wasn’t compatible with my values. Animal welfare is very high on my list. In the 80’s and 90’s pulling the horse behind the vertical was very much rewarded by judges. Riding with a double bit and spurs didn’t fit either: Less is More, right? I wondered what I loved about the riding dressage competitions and if I could take that and honour my values? I loved: riding for an audience, inspire people what you can accomplish with good riding and training and how beautiful it is to see a rider and her horse in total harmony. It took a few sessions with my mentor to figure it out.
Finally I came to the conclusion that riding in a show- or demo team would fit: no judges or rules what to do and when to do it (even if the horse isn’t ready in that moment, or feeling pressured to perform at cost of the horse). If you write your own choreography and something happens you can go with the flow of your horse and still give a wonderful show.
Yes, that would make perfect sense! Suddenly I had my motivation back for riding. Then something amazing happened: I saw a small ad in somewhere. A showteam with Andalusian stallions was looking for team members! That’s how I became a member of Showteam Alegría. I was part of Alegría for years and we did many performances. Unfortunately Kyra and I moved to Canada before Kyra was under saddle, so I never actually rode but it was such a great experience and so much fun.
Tip 2 For a Training Plan that actually works
Once you’ve determined a clear goal which fit your values the next step is to divide it into smaller steps. What does your horse need in order to get to your goal?
‘Riding in a show/demo team’ is a clear goal, because the choreography was designed by ourselves and fitted all individual horses. The next step was to ask myself what Kyra needed to master?
If I give shows she needs to become a good traveller (trailer loading), she needs to be calm and confident around music, lots of people, applause, dogs, strollers and a million other things (despooking/mind set) and she needs to master her exercises for the performance (trick training, long reining -> “ground work”). In order to perform, the horse also needs to be OK with grooming, being washed, braided and so on (husbandry skills). So my pillars in my training plan became: Husbandry skills, Mindset, Groundwork and Riding. That’s what I teach my students to do, too.
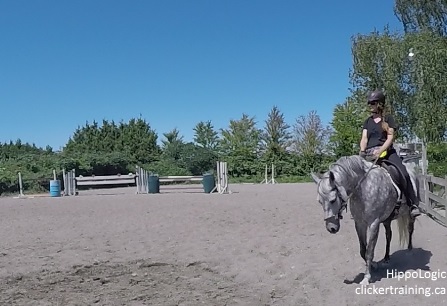
This helped me very much to make a visual. Here is an example of a training plan for dressage test level 4. I would train all exercises of the test first in from the ground (long reins, work-in-hand or at liberty) before training them under saddle.
You can make this as detailed as you need, depending on what your horse needs. A lot of this is also applicable if you want your horse to become a reliable trail horse.

Tip 3 For a Training Plan that actually works
Now you have a detailed Training Plan you can seek out the perfect instructor/mentor for the knowledge and skills you need to learn or improve. If you are not familiar with despooking your horse using positive reinforcement only or don’t know how to teach your horse lateral gaits, find some one who does. You can contact me, for instance.
Together with your values it will be much easier to find a mentor/coach that can help you achieve your goals. This safes time and money! How many clinics have you

attended that you thought would be helpful and awesome only to be a disappointed and go home disillusioned because ‘in harmony’ or ‘positive horsemanship’ was not what you had in mind when you booked yourself a seat.
If you know exactly what you’re looking for, it’s way easier to find. Even if you feels you’re looking for an unicorn.
I hope this gave you some ideas.
PS I am currently working on an online workshop to help equestrians with making their own personalized Training Plan. Contact me if you’re interested in this interactive workshop. I would love to know if there is enough interest to make this happen.
Join our Community!
- Are you looking for professional positive reinforcement advice?
- Do you want an affordable program?
- Do you want to turn your equestrian dreams into reality, but you don’t know where to start?
If you have answered ‘Yes’ to one or more of the above questions look into one of the online programs HippoLogic has to offer.
Join our community for online positive reinforcement training tips, personal advice and support in training your horse.
Shape the community
If you’re interested to become a member of the HippoLogic tribe, please tell me what you want in this short questionnaire. Thanks a lot!
Sandra Poppema, B.Sc.
I help horse owners get the results in training they really, really want with joy and easy for both horse and human. I always aim for win-win!
Sign up for my newsletter (it comes with a gift) here: HippoLogic’s website.
Start for free!
Book a free 60 minute Discovery Session to get a glimpse of a new future with your horse. In this conversation we’ll explore:
- Your hopes and dreams and goals so that we can see what’s possible for you and your horse

Your Key to Success
- Where you’re now, where you want to go and which path is right for you
- What’s holding you back so you can make a plan to get these hurdles out of your way.
At the end of the call I’ll give you some ideas and advice for your next step and if it looks like a fit, we can explore what it looks like to work together.
Simply check the best time for you in my online calendar and click to reserve your free call today.

 I decided to make a training out or it, but whatever I did nothing worked long-term. Next day it all seemed forgotten. Which it wasn’t really, it was just the pull of the grass that was so much stronger than my pull on the lead rope. So the behaviour was very much self-rewarding.
Only one thing to do: become more enticing than the grass! The only way to do this is with 100% positive reinforcement.
In the article I wrote for Horse Rookie I describe two ways of approach, depending of the level of clicker training your horse had before.
All horses like ‘grass training’ because it’s a win-win: either grazing or not grazing is rewarded. READ THE ARTICLE HERE
Imagine how much frustration you’ll avoid!
I decided to make a training out or it, but whatever I did nothing worked long-term. Next day it all seemed forgotten. Which it wasn’t really, it was just the pull of the grass that was so much stronger than my pull on the lead rope. So the behaviour was very much self-rewarding.
Only one thing to do: become more enticing than the grass! The only way to do this is with 100% positive reinforcement.
In the article I wrote for Horse Rookie I describe two ways of approach, depending of the level of clicker training your horse had before.
All horses like ‘grass training’ because it’s a win-win: either grazing or not grazing is rewarded. READ THE ARTICLE HERE
Imagine how much frustration you’ll avoid!
 Enjoy the accountability and group learning. Put your name on the waiting list and get emailed when we start!


 Do you want a training journal that helps you improve your riding skills? Don’t use it as a diary, use it as the powerful training tool it can be. In a diary you write down what you’ve done and how you felt about it. My training diaries from 20 years ago are all similar and I read things like: ‘I rode, it was fun but the canter sucked. I did 3 tracks and every time my pony fell to trot all by himself.’ Maybe I added my opinion about my pony that day, but this is not constructive and didn’t help me improve and develop my skills.


 Most famous ones are the ‘be the leader’-myth and the ‘don’t let him win’-myth that refer to the idea of one alpha horse that makes all the decisions and is the dominant horse of the herd. There is no such thing in a herd. Yes, horses can behave dominant in certain situations, but decisions when to move and were to go are more based on a (part of the) group decision.
 Horses don’t think in ‘winning or losing’ they act on ‘surviving or getting killed’. They spook because they are afraid, not because they are ‘out to get you’ or ‘want to avoid work’ or ‘are acting out’.


 How do you apply positive reinforcement methods in a negative reinforcement environment? For instance: how do you deal with your riding instructor’s instructions if he/she is not a clicker trainer?


You must be logged in to post a comment.