4 Benefits of Teaching Your Horse to Target

The Key Lessons are my Key to Success in Equine Positive Reinforcement Training. One of my keys to success is Key Lesson Targeting. In this blog I will share the purpose and benefits of this basic exercise. Watch the videos in this blog.

What does Key Lesson Targeting look like

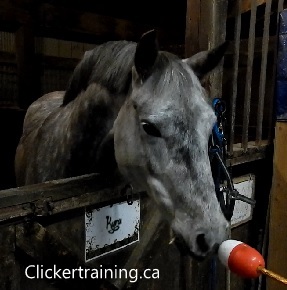
The horse learns to touch an object (target) with a certain body part.

I always start with nose targeting and I like to use my DIY target stick (a floater on a stick) as object. When the horse touches the target, he hears a click (which marks the desired behaviour) which is followed by a reinforcer.
targeting

Purpose of Key Lesson Targeting

  • Safety. By using a target on a stick you can create distance between you and your horse. You can use targeting while working with protective contact (a barrier between you and your horse), so you don’t even need to be in the same space in order to train him.
  • Clarity. A target creates clarity for the horse. Many behaviours are way quicker to train with a target than without one. The target gives the horse a clear clue: that is the object to interact with. Using targeting to train complex behaviours is easier than purely relying on your free shaping training skills. Example: After lots of repetition the target stick becomes really attractive. Your horse now really wants to touch it!  That makes it very useful when you add the criterion ‘distance’ into training. It can almost become like a magic wand which you only have to wave and your horse will come. Then you simply add a cue (his name) and voila! Your horse learned what to do when being called. The target stick provided the clarity.
  • Great foundation to teach to target other body parts and/or train other behaviours  (possibilities are endless).

Benefits of teaching your horse Key Lesson Targeting

  1. Your horse learns to pay attention to the target, not your hands or the treats, which is the case with luring.
  2. Your horse learns that he has to do something (offer a behaviour) in order to receive a click and reinforcer. Targeting is a very simple behaviour (you can make it really easy by holding the target close) which makes it an excellent exercise to start clicker training your horse.
  3. It is a great way to teach your horse that he can influence the clicks and reinforcers by his own behaviour, in other words to explain your horse the ‘rules of clicker gaming’.
  4. Key Lesson Targeting is Your Key to Success in teaching your horse many other useful behaviours too, like following a target to create behaviours like head lowering, walk, trot, canter or to teach your horse to be send away from you (to a distant target). Teach your horse to touch a stationary target to get in and out of his stall while feeding or you can use targeting to trailer load, respond to his name, mat training and so on. Your imagination is the limit.
  5. You teach your horse to move towards something (target) instead of moving away from something (pressure). Your horse has to make a conscious decision in order to do this. You teach him to think.

Advanced Targeting ideas

Nose target: teach your horse to respond to his name, get him out of the pasture, walk, trot, canter, halt, small jumps, big jumps, touching scary things, ‘dismount me please’-signal, colour distinction, shape distinction, ring a bell, pick up an item and retrieve.

Ear target: helps in cleaning ears, trimming hairs, self-haltering

Mouth target: oral medication, de-worming, checking teeth/mouth

Eye target: cleaning eyes, adding ointment or eye drops

Hip target: aligning to a mounting block, travers, appuyement

Shoulder target: shoulder in, sideways, aligning to mounting block

Neck target: injection training

Tail target: backing, sitting

Stationary target (a ball that you hang on a wall or a mat on the ground): teach your horse not to crowd you when you bring food, send your horse away from you, send your horse over a jump

Hoof target: mat training, preparing for the farrier: lifting legs, using a hoof jack, stepping on a pedestal, tarp, trailer ramp, into water

Knee target: Spanish walk, Spanish trot

Just to give you a few ideas.

Read more about targeting:

Key Lesson Targeting

Benefits of the HippoLogic Key Lessons

Please share

If you think this is a blog that someone can benefit from, please use one of the share buttons  below (under the video!). I’ also would love to read your comments, I read them all!

If you don’t know what to say simply hit the like button so I know you appreciated this blog. Thank you!

HippoLogic.jpg
Sandra Poppema, B.Sc.
My mission is to help equestrians create the relationship with their horse they’ve always dreamt of. I do this by connecting them with their inner wisdom and teach them the principles of learning and motivation, so they become confident and skilled to train their horse in a safe and effective way that is a a lot of FUN for both human and horse. Win-win.

Sign up for HippoLogic’s newsletter (it’s free and it comes with a gift) or visit HippoLogic’s website and discover my online courses that will change your life.

Follow my blog  on Bloglovin


Husbandry skills: Hoof Care (part II)

In this series I will keep you posted about the young horse I am training in order to prepare her for the next farrier visit. I will call her A. in this blog. A. is scared to let people touch her legs, especially her hind legs. She kicks out when she feels something touching her hind legs.

In my last blog I wrote how I started her training. She is now used to the clicker. She knows that a click is an announcer of good things coming her way: appetitives (in this case treats). She understands my end of session signal that tells her that there are no more treats to be earned.

Training Tools

Besides a clicker and treat I use a target stick that I made from a piece of pool noodle on a stick. I chose a pool noodle because they are soft, light weight and cannot hurt the horse accidentally.

I did not start with nose targeting this time. I used the target to touch A. The aim is to teach her that touching her hind legs is safe, will lead to appetitives (something the horse likes to have, such as a treat) and that she is in control (no force or coercion) about accepting her body to be touched. For obvious safety reasons I still work with protective contact. A. is allowed to kick the pool noodle in case I go too fast and nobody will get hurt.

Introducing the Pool Noodle

I already knew A.’s favourite spots to scratch her, so I kept those in mind while training.

I introduced the pool noodle by holding it in front of her and click and treat her for looking at it. I am still working with protective contact (a barrier between her and me). She wouldn’t touch the target in the beginning.

Then I held it a bit more to the left on my side of the fence, still not too close, and clicked and reinforced A. for ‘standing still’. Then I held it a bit more to the right, near her withers and so on. Clicking and reinforcing every little step in order to give her confidence that standing still is what I want from her. Nothing else.

Little by little I could hold the target closer and closer until she could touch it. I haven’t clicked and reinforced much for touching with her nose or sniffing since my goal is not to teach her to touch the pool noodle with her nose. She wasn’t afraid of the pool noodle target by the way, just curious.

Training logbook

_Husbandry skill_hoof care_hippoLogic

After 3 sessions of each 5 minutes I could touch her with the pool noodle on the withers, her chest/throat/mane and her bum. If she moved away, even a little weight shift, I went back to the previous steps when she was still relaxed and OK with it. I would take a step back and continue a bit slower. In positive reinforcement training you mark the desired behaviour. If A. wants to move away that is OK. I just wait until she is ready to come to me and present her body close to the fence so I could touch her with the pool noodle again.

I don’t keep the pool noodle on her body until she stops moving. That would be negative reinforcement (strengthening the behaviour (standing still) with taking away the aversive (the thing she wants to escape).

I know it took 3 sessions because I keep a training logbook. I keep track of time, how many sessions we do each day, how long the sessions are, how long the breaks are (usually 2-3 minutes), where we train (A. lives in an in/out stall and sometimes we train outside, sometimes inside) and how much progression we made and also what startled her or what body parts he becomes anxious. I also wrote down the next steps of her training.

I end every session with an end of training signal. Sometimes A. keeps standing aligned to the fence in the hope of getting scratches, sometimes she walked right back to her hay to eat.

In the next blog I will tell you more about how A.’s training is progressing.

Read the previous blog: Husbandry skills: hoof care (part I)

Sandra Poppema, B.Sc.
Are you inspired and interested in personal coaching or want to be a part of my HippoLogic Clicker Training Academy in which we have weekly group clicker coaching, clicker courses and a private online R+ community take action! CLICK the links to learn more.

DIY target stick

DIY Target stick for Horse Training

PS Make sure you subscribe to our new blog location!

Happy Horse training!

Sandra

Techniques to get behaviour part II: shaping, targeting & capturing

[Click hier voor de Nederlandse versie van dit artikel]

In part I of this series I discussed the pros and cons of luring and moulding. In this part I will talk about shaping, targeting and capturing.

Shaping
In shaping the goal behaviour is achieved by splitting the desired behaviour into many tiny steps. Each step is trained separately (clicked and reinforced). A criterion is only raised if the previous tiny step is confirmed. In this way you can build a behaviour from scratch (free shaping). One can also shape existing behaviours. This is when elements like distractions or duration are gradually added.

Pros of shaping
It is a safe and sure way to train any behaviour.

It is a good way of setting the horse up for success: each step of the process is easy to understand and easy to perform. The bridge signal ‘guides’ the horse through the process, so he gets lots of information about what is expected.

It can be used to train very difficult and complex behaviours.

The horse is not restrained in any way. This makes it easier to notice mental changes (emotions) or physical changes like fatigue in your horse.

Cons of shaping
It can be hard for a trainer to split the behaviour into small enough steps. If the trainer is ‘lumping’ (making the steps too big, raising the criteria too fast) shaping can cause frustration in trainer and horse.

Depending on the behaviour, the process can take a while since every step of it has to be trained separately.

The rewards must be reinforcing enough and the tasks must be challenging enough to keep the horse engaged. That can be a challenge.

Trainer must have a keen eye and perfect timing to observe and click the tiniest steps towards the goal behaviour.

Targeting
Targeting is touching a specified surface (eg a target stick) with a particular body part. Example: teaching your horse to touch a target stick with his nose. The target is not a lure because it is not a primary reinforcer. Targeting is taught through shaping.

hippologic key lesson targeting

Pros of targeting
Targeting has a lot of practical uses and you can train almost any behaviour with it.

It is a safe training method. There is no need for physical contact, so you can train even your horse from behind a barrier if necessary or desirably.

The target is not distracting the horse like a lure would.

A target on a stick can enlarge your reach. You can send your horse away from you and your pocket full of treats.

The horse is free (not restrained) during training and it is easier to notice emotions in training like fear, curiosity, frustration and so on. It is also easier to notice if your assignment is physically (im)possible to perform for your horse or to notice fatigue.

Cons of targeting
You have to fade out the target. That can be a bit of a challenge. The best way to do this is to put a cue on the behaviour first.

It is an extra tool in your hands.

Targeting is taught through shaping, see cons of shaping.

Capturing
Capturing is ‘catching’ the end behaviour as it happens with your bridge signal and reinforcing it. Example: the classical bow looks very much like the natural behaviour of a stretch after a nap.  Click and reward your horse while he is stretching. Capture the behaviour several times. Then add a cue. See also Introducing and using cues.

Pros of capturing
The most obvious pro is that it is a really fast way to get a new behaviour, since the horse is already displaying the ‘goal behaviour’.

It is a safe method to train the behaviour.

Novice trainers can use it. Timing doesn’t have to be very accurate.

Cons of capturing
The training is totally dependant on the horses willingness to perform the behaviour and the chances of the trainer being present at the time. The trainer must have a bridge signal and reward present.

It can be hard to communicate a (new) cue to your horse. While training you may have accidentally introduced one already.  You might not know what it is as a horse is very perceptive of your unconscious movements. This might be difficult to change afterwards.

My favourite training methods
These three are my favourite ways of getting a behaviour. I use targeting and shaping on a daily basis.

I used capturing to teach Sholto the classical bow (see picture below) and flehmen on command. Kyra’s lying down and nickering to me are also taught through capturing.

_classical bow_buiging_hippologic

Kyra’s flemen and her classical bow (see picture below) are taught with shaping and targeting.

KONICA MINOLTA DIGITAL CAMERA

What is your most used method to teach your horse behaviours?

Safe the date: Thursday March 7, 2019

Ultimate Horse Training Formula, Your Key to Succes 

_key to success_hippologic1

  • Want to get the results in training you really, really want?
  • Want train your horse with confidence?
  • Want to learn all there is to know about training your horse with positive reinforcement?

Join this online course and participate for free every time! Click here

Clicker Training Mastery (advanced course) starts March 6, 2019

_Kyra_en_ik_hippologic
Sandra Poppema, B.Sc.
I help horse owners get the results in training they really, really want with joy and easy for both horse and human. I always aim for win-win!
Sign up for HippoLogic’s newsletter (it’s free and it comes with a gift) or visit HippoLogic’s website and join my online course Ultimate Horse Training Formula in which you learn the Key Lessons, Your Key to Success in Clicker Training.
Follow my blog  on Bloglovin