5 Useful Techniques to prepare your horse to Vet Visits

We hope this never happens, but it does. Horses get into accidents, fights, and other trouble. If you’ve been long enough around horses you know that crazy stuff happens. No matter how careful you are… Equine first aid is a necessity for all horse owners.

Rusty nail

Kyra stepped into a 2 inch (5 cm) rusty nail on Saturday. She was lame and I discovered the nail when I rinsed the mud off her leg and foot with cold water.

It wasn’t in her foot all the way, but a good 1,5 – 2 cm. Not straight upwards luckily.

Hoof wrapping

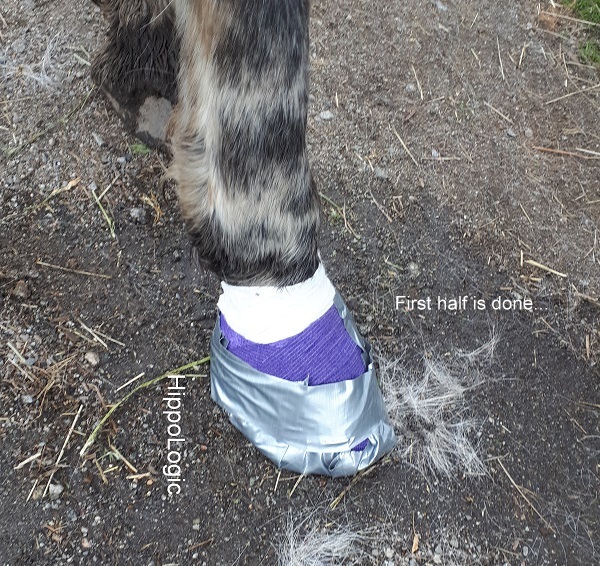
When the nail was out (I just pulled it out) immediate relief from Kyra. Then I got a quick lesson in hoof wrapping from my barn manager. One of the perks at boarding out and have experienced horse people around.

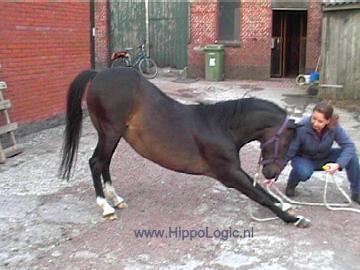
Vet care training for horses

I have had “vet care training” since day 1 in my training program. Kyra came wounded to me. So she could already be hosed off, put her foot in a bucket with water and lift her legs.

You don’t want to start training these kind of things in an emergency!

Vet visit

When the vet came Kyra behaved so nicely. When she pushed on the wound Iused the open bar/closed bar technique and Kyra really appreciated it! She didn’t fight although it was very clear she was in much pain! She didn’t kick and let the vet do her work. Wow, that’s such a great feeling! Safety for everyone involved and the best treatment (because the horse lets the vet).

Be prepared!

Prepare your horse before you need it! Trailer loading, rinsing off legs (up until 10 minutes), injections, training for calm behaviour and standing still for longer periods of time (up until 10 minutes) are very helpful!

Useful techniques in vet care training

Techniques you can use for vet care training:

  1. A tiny bit of moulding/molding can help teaching your horse to stand in a bucket (rubber pan). It can be hard to free shape it so that they step into the pan themselves, especially with their hind legs.
  2. Duration. In vet care procedures ‘duration’ is so important. In our minds 10 seconds seem very short, but we also know when we are in the dentist chair without freezing and the drill drills 10 seconds, it’s suddenly ver, very long. Since horses don’t know when we stop with unpleasant procedures it’s even more difficult for them. They really have to trust you!
  3. Start button behaviour. Teach a behaviour so the horse can indicate: ‘I am ready.You can do what you need to do now.‘ Eg teach them to touch a target.
  4. Stop button behaviour. Teach a behaviour so they can indicate ‘Stop the procedure.’ You can teach them to touch a different target than you use for the start button behaviour.
  5. Open bar/closed bar. This is a great technique if the horse is not clicker trained or not prepared well enough. It also helps in quickly building duration. You ‘open the bar’ as soon as the behaviour starts. For instance putting the hoof into the bucket of water, holding up their hoofs for dressing or farrier work. When the horse pulls back, you let go of the foot (if possible!) and stop feeding: you ‘close the bar‘. You ‘open the bar‘ again and start feeding as soon as the horse offers the desired behaviour. The reinforcers must be high enough value to make it worthwhile. If you’re building duration a food reinforcer that they have to chew on long(er) is a good choice. Eating also distracts from the procedure and if they stop chewing with food in their mouth it can be an indication of increased stress or worry.

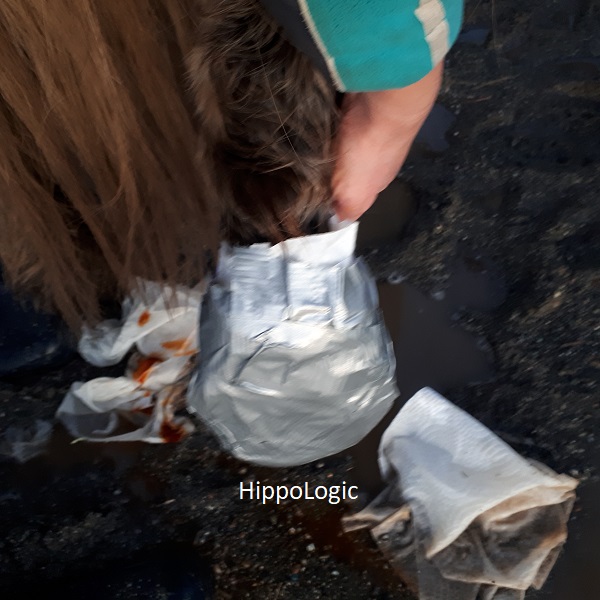
Make a good hoof wrap out of duct tape

In the next blog I will show you how I make a ‘space shoe’ out of duct tape and other items to keep her foot clean and dry in the mud. I took lots of photos and made videos of our training. Here is one of Kyra’s space boot the next day. It kept well in the mud.

Keep updated by clicking ‘follow this blog’ in the side menu.

Do more with Clicker Training!

Are you a compassionate horse owner who wants to build a strong friendship with your horse? Would you like to understand your horse better and help your horse to understand YOU better? Get access to high quality online training and a fabulous, supportive R+ community in our HippoLogic Clicker Training Academy. Check out the link!

Want to do more with Clicker Training?

Join the HippoLogic Academy! I coach and support you personally getting your dream results with positive reinforcement, so that you can bond with your horse in the process. Create a connection build on mutual trust and understanding, a clear two-way communication built on love. Click the image to go access the application form โ†“

Not sure? Start with a free clicker training assessment to get taste of what it feels like to work with me. When you have a specific struggle that you want to overcome, don’t hesitate to contact me.

In this assessment you’ll discover what’s holding you back from accomplishing the things you want with your horse. After our conversation you’ll know exactly what to do, in order to move forward towards your goals.

Book here

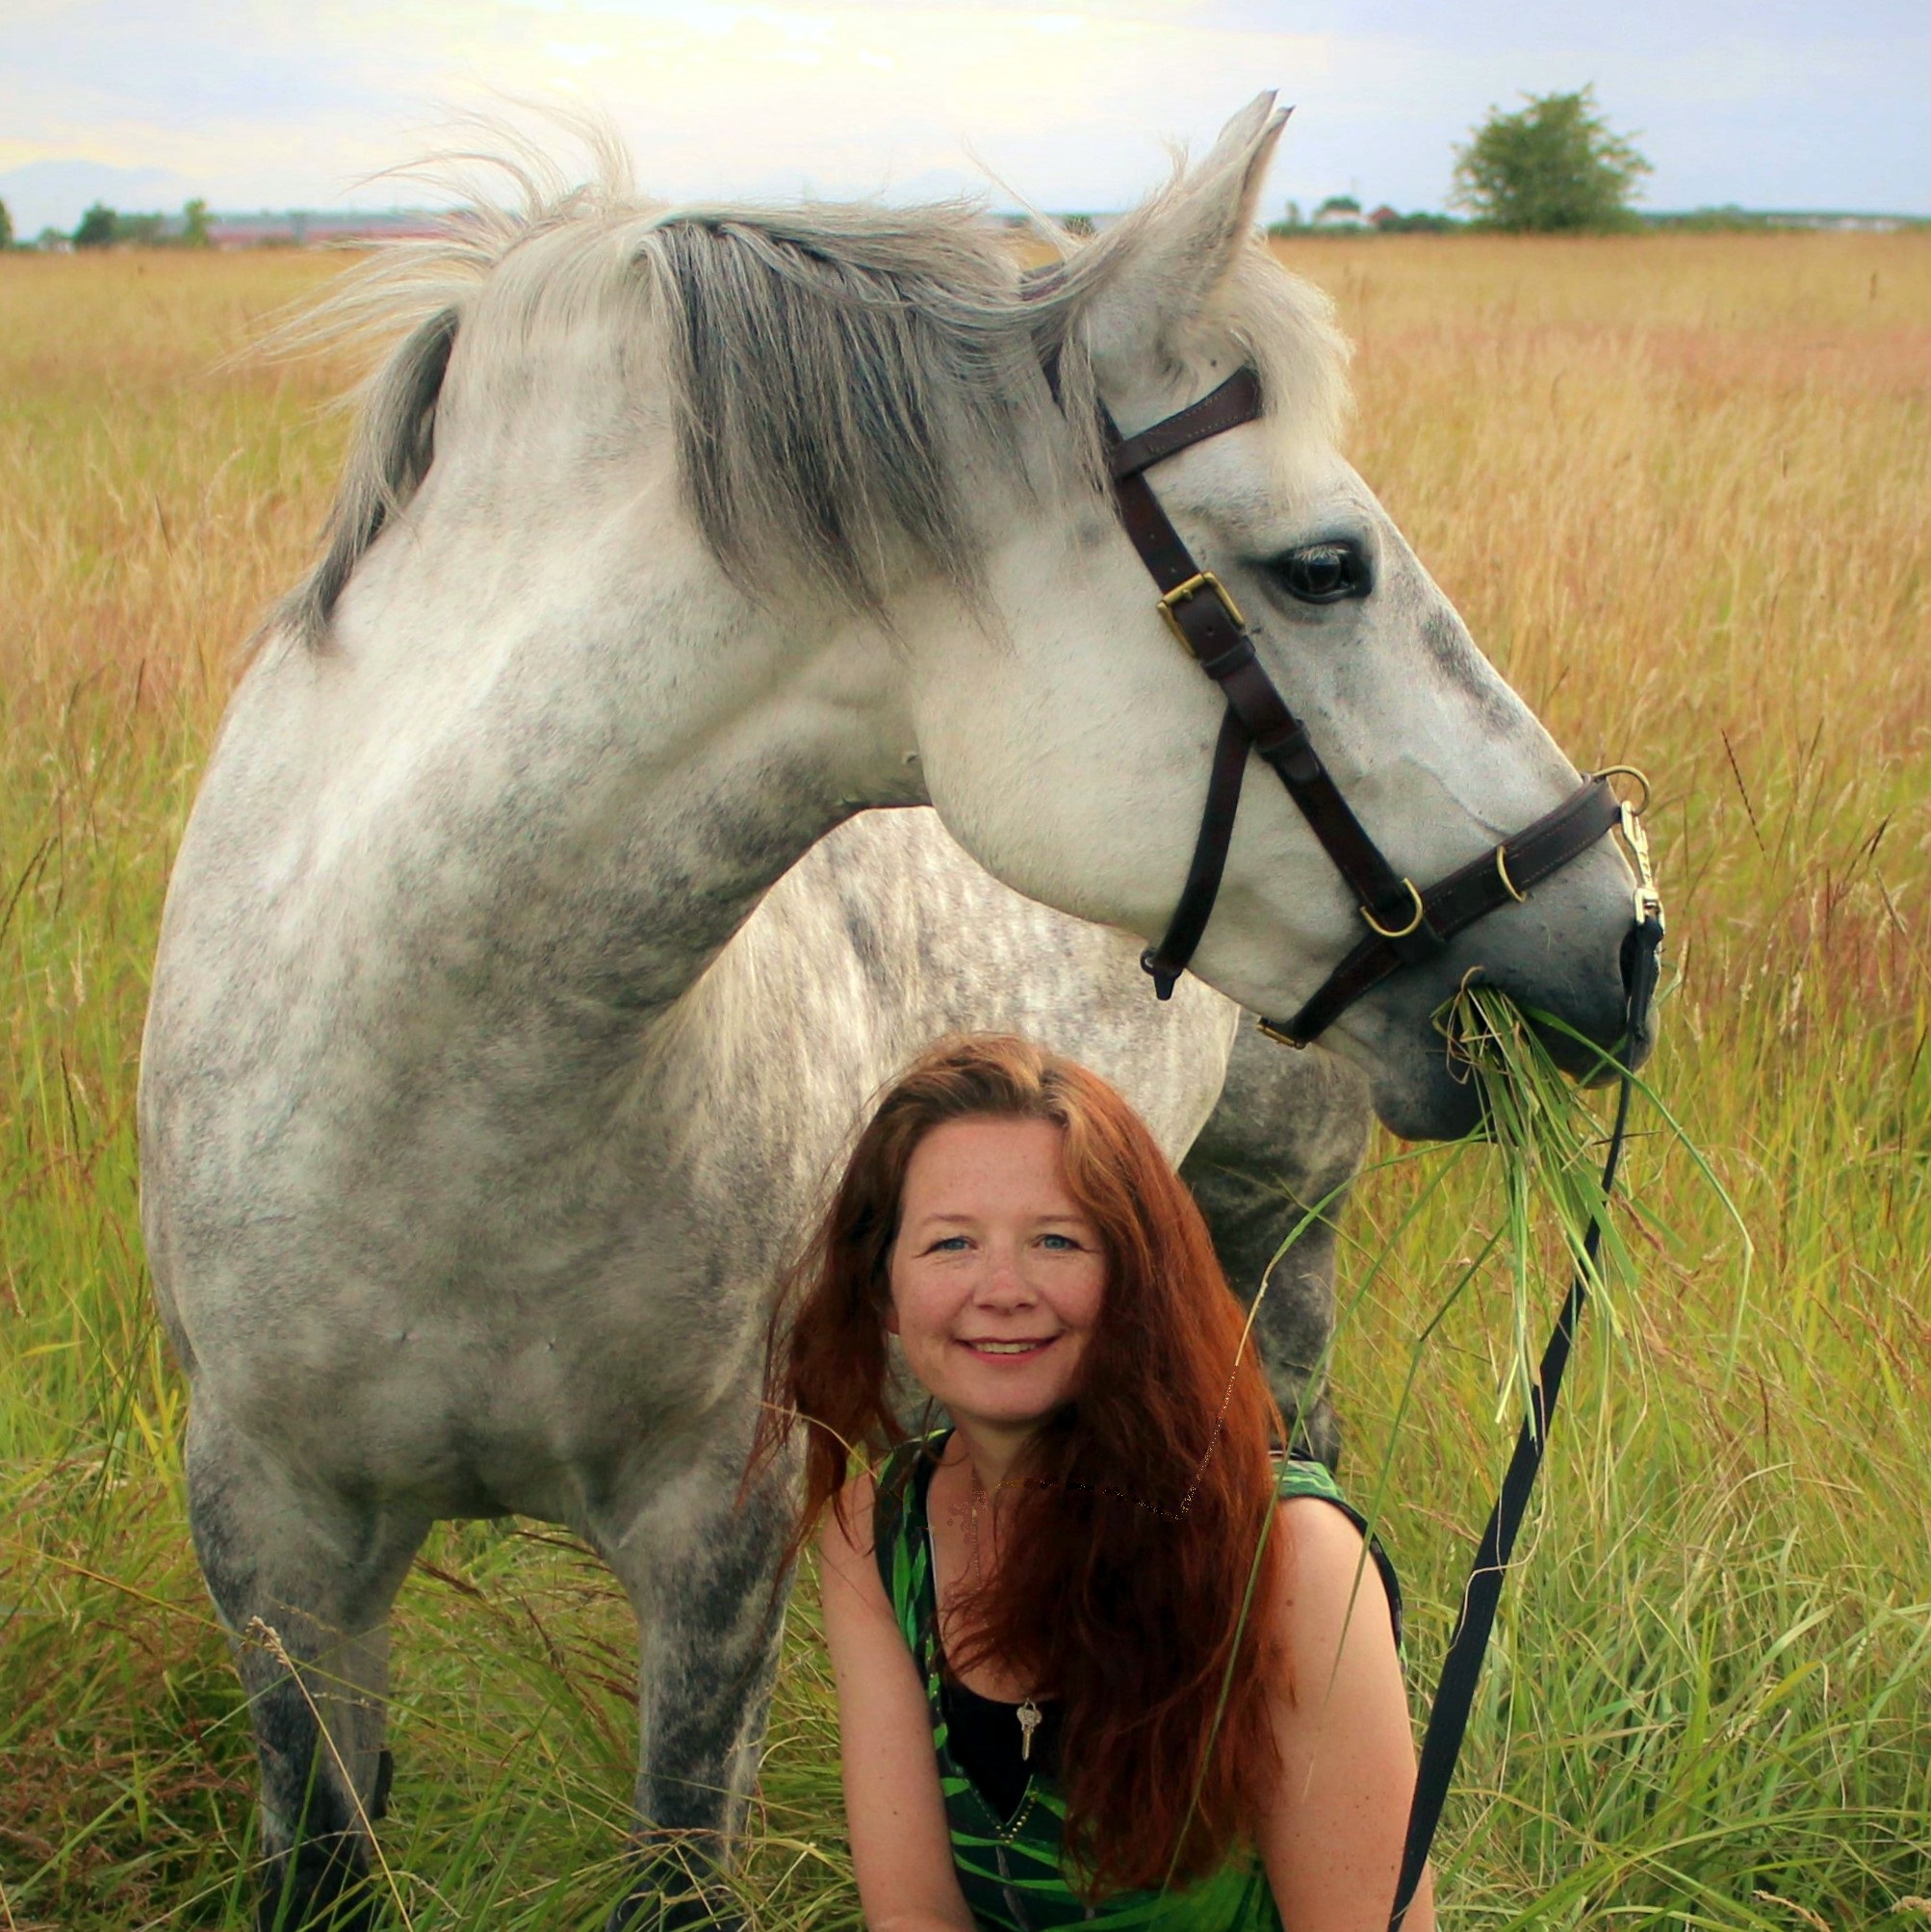
Happy Horse training!
Sandra Poppema, B.Sc., founder of HippoLogic & HippoLogic Clicker Training Academy

Join us!

How to Teach Your Horse to do Crunches with 100% R+

The body worker/chiropractor came by for Kyra a few weeks ago. She wasn’t walking well and her back is swaying (sags). In this blog I share my shaping plan and point out most common pitfalls in teaching your horse to do crunches.

The equine body worker/chiropractor did great work by helping Kyra’s body relax and getting rid of some blockages. Our home work was belly lifts (abs). He showed me how to do it: by placing your fingertips (using your nails) at the sternum and pushing up.

Of course that worked… He explained it was a reflex. I believe it’s a response to an aversive, not a reflex in the biological sense of the word.

I don’t work with aversives in training, therefor I had to figure out another way to communicate that I wanted belly lifts from Kyra and I did.

I thought of which behaviours we already have on cue (standing square, backing) and used those as foundation for the belly lifts. Kyra now lifts her back about 2 cm on verbal and body language cue and she is getting better at it every day.

This video is session 4 and Kyra totally rocks! She even offers duration: she flexes her abs a split second longer, and that’s all it takes to start building duration, see video below.

Shaping plan

Kyra already mastered standing square (which is part of Key Lesson Patience) and also backing up (Key Lesson Backing). The Key Lessons in the HippoLogic program are the basics you can built all other behaviours on.

Here is the basic step-by-step plan (shaping plan) I used to train Kyra to free shape belly lifts (back lifts):

  • Standing square, weight on both hind legs equally divided (vertical balance)
  • Minimal weight shift to hind quarters
  • Add: flexing abs (belly lifts, back comes up)
  • Reduce: moving backwards
  • Add: head/neck position (Feeding for Position is a great help)
  • Add: duration
  • Add: repetitions

As with all shaping plans, each step can be divided into multiple steps and have to be trained over multiple sessions. Depending on the horse and trainer more steps can be added.

Pitfalls

Training without a system is setting yourself up for failure. Before you start, think about these common pitfalls and prepare yourself.

Shaping plan: Not making a plan before you start. What does the behaviour look like? What are my criteria? When do I stop? How long do I train? If you don’t think before you start, you have to think a lot more after you started. Reshaping a trained (reinforced) behaviour can be way more complicated and more difficult than training a brand new behaviour. A shaping plan prevents frustration in trainer and horse.

Timing: if you click too late, your horse thinks he has to back up. Click too early he thinks he just has to stand or do whatever he was doing (moving his head, tail, legs). Important to click the instant he starts shifting his weight backwards. It’s almost for clicking for ‘thinking to step backwards’.

Reinforcers: if you give your horse verbal praise or a treat he doesn’t value, you don’t get more of the marked (desired) behaviour. Find out what your horse loves to work for. If the wanted behaviour increases, the reinforcer was valuable.

Criteria: make sure you have small enough steps for your horse to understand what you wants. Make the criteria as clear as possible for yourself. Reinforce micro-movements in teaching crunches. Make criteria as clear as possible: eg don’t click for weight shifts while sniffing your pockets (go back and practise Key Lesson Table Manners first. This will safe time later. Don’t wait too long to click or you’ll have ‘too much behaviour’ (a step backwards, instead of weight shift). Goal is to lift the back, not (only) shifting weight!

Benefits of doing crunches

I think you don’t have to wait for your horse to get a swayed back before teaching your horse to do crunches (Pilates for horses, back lifts, belly lifts).

It’s a great way to strengthen your horse’s core muscles that will help him under saddle. Not only for riding but also to help him use his body in the best way he can. It keeps him healthy and strong and is a great way to create horizontal balance. It’s fun too! They learn to use their body’s in a way that benefits them and makes them more body aware.

In this video (session 6) you can see how much Kyra’s back lifts and how much it straightens.

If you need a bit of help with teaching your horse to do crunches, don’t hesitate to contact me.  That is what I do: helping equestrians get the results in training they really, really, really want.

Do you want to teach your horse crunches and don’t know where to start?

Book a free discovery call and I will help you figure it out!

_Kyra_en_ik_hippologic
Sandra Poppema, B.Sc.
I help horse owners get the results in training they really, really want with joy and easy for both horse and human. I always aim for win-win!
Follow my blog  on Bloglovin
crunches clickertraining hippologic

How to… shape behaviours

In positive reinforcement training one of the techniques to get behaviour is called ‘shaping’. Inย shapingย the goal behaviour is achievedย by splitting the desired behaviourย into many tiny steps. Each step is trained separately (clicked and reinforced).

Aย criterion is only raised if the previousย tiny step is confirmed. In this way you can build a behaviour from scratch (free shaping). Youย can also shape existing behaviours. This is when elements likeย distractions, distance or duration areย gradually added.

Shaping plan
It is not very common in horse training, but writing down your training steps in a shaping plan is a very valuable tool. It will help you become better at splitting behaviour faster.

If you think before you train, you know what to do when things don’t work out the way you expect. It is much easier to understand/findย which steps you skipped and what you can do next time. Even if you don’t bring your shaping plan to the barn, it is much clearer in your head once you’ve written it down.

The questions are:

What is the tiniest step you can think of to train behaviour X?
Next question is: can you split that step into smallerย steps?
Then: Can you make it even smaller?

It is not relevant if you think your horse already mastered aย particular step. Write them all down. One day you might train another horse that needs step 1 to start.

Start shaping
The easiest way to get experience inย shaping is to build on existing behaviour and modify it.

You can work on duration. Example: your horse already knows to lift his foot for cleaning but he is not yet ready for the farrier. You can shape the behaviour into holding his foot for longer periods of time. Each second can be one of the steps to bridge and reinforce.

_keylesson_target_voet2

Not only lifting his foot is important for a farrier, but also stretching the front leg forward will help the farrier trim the hoof properly. Once your horse can do that, you can also start building duration.

You can also shape ‘distractions’ into his training. Your horse can already lift his feet for trimming, but now you want to add people and or horses walking by while you’re hold your horses foot up. Or your horse needs shoes and you want him to get used to the hammering on the hoof or the smell of a hot shoe burning the hoof.ย Again, start with very tiny steps to implement these kinds of distractions.

Free shaping
In free shaping the trainer teaches a completely new behaviour to the horse, for instance teaching a horse to jump at liberty over a low jump. A horse will naturally avoid a jump if he can walk around it. That is why people build chutes and chase the horses over it with a lunge whip.

Wouldn’t it be great if you canย teachย him to jump over it because he choosesย to? If you can positively reinforce him to go over a jump he learns to like it in the process. After all: there is something in it for the horse (other than the relief of anyย pressure or threats taken away).

In order to shape the goal behaviour the trainer has to divide this complex behaviour into baby steps. What are the tiniest steps you can think of?

It depends on the horses attitude towards jumps and his experience with them. A general shaping plan for teaching to jump at liberty could look like this.

Each step can be divided into as many steps as your horse needs, for instance moving one step towards the pole must be repeated until the horse is so close he can step over it.

  • Look at the pole
  • Move towards the pole
  • Step over the pole with one foot
  • Step over the pole with two feet
  • Step over the pole with three feet
  • Step over the pole with four feet
  • Walk over the pole
  • Walk over the pole and keep walking forย 1 metre
  • Walk over the pole and keep walking for 1 + x metres
  • Trot over the pole
  • Keep trotting after the pole for 1 metre (1+x metres et cetera)
  • Changeย the pole for a caveletti/low jump and start from the beginning
  • Change the place of the pole/jump and moveย it from the rail a bit more to the middle
  • et cetera

It can help if you can use Key Lessons like standing on a matย (standing still and sending your horse off of the mat),ย back up and safe hand-feeding.

Until your horse can trot or canter the arena at liberty and jumps freely and enthusiastically over all the jumps.

Have fun shaping!

If you think this is a blog that someone can benefit from, please use one of the share buttonsย  below. Or post your comment, I read them all!

Or simply hit the like button so I know you appreciated this blog. Thank you!

HippoLogic.jpg
Sandra Poppema, B.Sc.
My mission is to improve human-horse relationships. Iย connect horse women with their inner wisdom and teach them the principles of learning and motivation, so they become confident and skilled to train their horse in a safe and effective way that is a lot of FUN for both human and horse. Win-win.
Sign up for HippoLogic’s newsletter (it’s free and it comes with a gift) orย visit HippoLogic’s website and discover my online course Key Lessons, Your Key to Success in Positive Reinforcement Horse Training.
Follow my blogย  on Bloglovin


Technieken om gedrag te verkrijgen: shaping, targeting en capturing

[Click hereย for the English version of this article]

Deel Iย van deze serie ging overย de voor- en nadelen van luring en moulding. ย In dit tweede deelย licht ik de begrippenย shaping, targeting enย capturingย toe.

Shaping
Shaping betekent ‘vormen’. Shaping houdt in dat het eindgedrag wordt bereikt door het op te delen in zoveel mogelijk kleine stapjes. Elk stapje naar het gewenste gedrag wordt afzonderlijk getraind (geclickt en beloond). Hetย criterium wordt pasย verhoogd als de vorige stap goed bevestigd is.

Door het doelgedragย in vele trainbare stappen te verdelen, kan elk gewenst gedrag vanuit het ‘niets’ aangeleerd worden. Dit heet free shaping.

Shaping kan ook worden gebruikt om al bestaand gedrag verder te trainen. Zo kan men langzaam elementen als duur, afleidingen of afstand erbij in trainen.

Voordelen vanย shaping
Het is een veilige en zekereย manier om elk gewenst gedrag te trainen.

Het is een goede manier om je paard op te zetten voor succes. Elke stap van het shaping proces is gemakkelijk te begrijpen voor het paard en makkelijk uit te voeren. Het brugsignaal (de click) begeleid het paard door het gehele proces, zodatย hij voldoendeย informatie krijgt over wat er van hem verwacht wordt.

Shaping kan gebruikt worden om complexe gedragingen aan te leren.

Het paard werkt in vrijheid. Dit maakt het gemakkelijker om mentale veranderingen in het paard op te merken (emoties) of fysieke veranderingen zoals vermoeidheid of fysieke beperkingen op te merken.

Nadelen vanย shaping
Het kan erg lastig zijn voor de trainer om het doelgedrag in voldoende kleine stappen te verdelen. ‘Splitting’ heet dat in het Engels. Als de trainer de stappen te groot maakt (‘lumping’) of zijn criteria te snel verhoogd,ย kunnenย paard en/of trainer gemakkelijkย gefrustreerd raken.

Afhankelijk van de complexiteit van het gedrag wat men wil trainen, kan shapingย enige tijd in beslag nemen. Elke kleine stap moet immers afzonderlijk getraind worden.

De beloningen moeten voldoende waarde hebben voor het paard en de taken moeten voldoende uitdaging bieden om het paard geรฏnteresseerd te houden. Dat kan een uitdaging op zich zijn.

De trainer moet een goed observatievermogen en goede timingย hebben om elke kleine voortgang naar het eindgedrag op te merken, direct te clicken en te belonen.

Targeting
Targetingย is het aanraken van een bepaaldย object (bv deย bal aan een stok, de targetstick) met een specifiekย lichaamsdeel. Het paard moet bijvoorbeeld met zijn neus de targetstick aanraken.

De targetstick is niet hetzelfde als luring ofย lokaas gebruiken omdat de targetstick geen primaire reinforcer (voer) is. Targeting wordt aangeleerd met behulp van shaping.


hippologic key lesson targeting

Voordelen vanย targeting
Targeting is een oneindigย veelzijdig omdat bijna elk gewenst gedrag met targeting aangeleerd kan worden.

Het is een veilige trainingsmethode. Er hoeft geen fysiek contact te zijn tussen het paard en de trainer. Je kan zelfs trainen met een hek tussen jou en je paard als dat wenselijk is of noodzakelijk.

De target heeft niet zo’n grote aantrekkingskracht als lokaas en leidt het paard daardoor minder af van het te leren gedrag.

Een targetstick kan je bereik vergroten (je arm verlengen). Je kunt met een lange targetstick je paard van je af leiden, dus weg van je zakken vol met lekkers enย uit je persoonlijke cirkel. Zie foto hierboven.

Het paard kanย vrij lopenย tijdens de training waardoor het gemakkelijker is om emoties in het paard op te merken zoals angst, nieuwsgierigheid, frustratie enzovoort. Ook is het gemakkelijker om te zien of het paard fysiekย in staat is de opdracht uit te voeren.

Nadelen vanย targeting
Je moet de target afbouwen. Dat kan een uitdaging zijn. De gemakkelijkste manier is om het gewenste gedrag eerst goed op cue te zetten.

De targetstick is een extra stuk gereedschap in je handen.

Targeting wordt aangeleerd door middel vanย shaping,ย zie nadelen vanย shaping.

Capturing
Capturing betekent letterlijk hetย โ€˜vangenโ€™ van het doelgedrag met de clickerย (markeren) enย het versterken (belonen). Voorbeeld: de klassieke buiging lijkt ergย op het natuurlijke gedrag van een paard dat zich uitrekt na een dutje. Click en beloon terwijl je paard zich uitrekt.

Voordelen vanย capturing
Het grootste voordeel is dat het een snelle manier is van iets nieuwsย aanleren, aangezien je paard het eindgedrag al vertoont.

Het is een veilige manier van trainen, het kan van een afstand.

Onervaren trainers kunnen het gebruiken. Je timing hoeft niet heel nauwkeurigย te zijn om het (hele) gedrag te markeren.

Nadelen vanย capturing
De gehele training staat of valt met de bereidheid van het paard het gewenste gedrag te vertonen als de trainer aanwezig is. De trainer moet altijd zijn brugsignaal en beloning bij de hand hebben.

Het kan lastig zijn om het paard achter een nieuwe cueย voor het gewenste gedrag aan te leren. Tijdens het aanleerproces kan je paard iets al als een cue hebben opgevat. Aangezien de trainer niet weet wat het paard als cue opgevat heeft,ย kan de trainer dit niet in zijn voordeel gebruiken om van de ‘werk cue’ over te switchen naar de ‘definitive (opzettelijke) cue’. Zie ookย Introducing and using cues.

Mijn favoriete training methodes
Bovenstaande drie methodes zijn mijn meest gebruikte technieken in paardentraining. Targeting en shaping gebruik ik dagelijks. Ik ben altijd alert om gewenste gedraging te ‘vangen’ (capturing).

Ik heb capturingย gebruikt om Sholto de klassieke buigingย aan te lerenย (zie onderstaande foto) en het flehmen op commando. Bij Kyra heb ik het liggen en het naar mij hinniken met capturingย aangeleerd.

_classical bow_buiging_hippologic

Kyraโ€™s flemen enย haar klassieke buiging heb ik haar stap-voor-stap met een combinatie van shaping en targeting aangeleerd (zie onderstaande foto).

KONICA MINOLTA DIGITAL CAMERA

Welke methode gebruik jij het meesteย om nieuw gedrag aan te leren?

Sandra Poppema
Bezoekย mijn websiteย voor persoonlijk adviesย of hulp bij clickertraining

Volg mijn blog ook op Bloglovin

Techniques to get behaviour part II: shaping, targeting & capturing

[Click hier voor de Nederlandse versie van dit artikel]

In part I of this series I discussed the pros and cons of luring and moulding. In this part I will talk about shaping, targeting and capturing.

Shaping
In shaping the goal behaviour is achievedย by splitting the desired behaviourย into many tiny steps. Each step is trained separately (clicked and reinforced). Aย criterion is only raised if the previousย tiny step is confirmed. In this way you can build a behaviour from scratch (free shaping). One can also shape existing behaviours. This is when elements likeย distractions or duration areย gradually added.

Pros of shaping
It is a safe and sure way to train any behaviour.

It is a good way of setting the horse up for success: each step of the process is easy to understand and easy to perform.ย Theย bridge signal ‘guides’ the horse through the process, so he gets lots of information about what is expected.

It can be used to train very difficult and complex behaviours.

The horse is not restrained in any way. This makes itย easierย to notice mental changes (emotions) or physical changes likeย fatigueย in yourย horse.

Cons of shaping
It can be hard for a trainer to split the behaviour into small enough steps. If the trainer is ‘lumping’ (making the steps too big, raising the criteria too fast) shaping can cause frustration in trainer and horse.

Depending on the behaviour, theย process can take a while since every step of it has to be trained separately.

The rewards must be reinforcing enough and the tasks must be challenging enough to keep the horse engaged. That can be a challenge.

Trainer must have a keen eye and perfect timing to observe and click the tiniestย steps towards the goal behaviour.

Targeting
Targeting isย touching a specified surface (eg a target stick) with a particular body part. Example: teaching your horse to touch a target stick with his nose. The target is not a lure because it is not a primary reinforcer. Targeting is taught through shaping.

hippologic key lesson targeting

Pros of targeting
Targeting has a lot of practical uses and you can train almost any behaviour with it.

It is a safe training method. There is no need forย physical contact, so you can train even your horse from behindย a barrier if necessary or desirably.

The target is not distracting the horse like a lure would.

A target on a stick can enlarge your reach. You can send your horse away from you and your pocket full of treats.

The horse is free (not restrained) during training and it is easier to notice emotions in training like fear, curiosity, frustration and so on. It is also easier to noticeย if yourย assignment is physically (im)possible to perform for your horse or to notice fatigue.

Cons of targeting
You have to fade out the target. That can be a bit of a challenge. The best way to do thisย is to put a cue on the behaviour first.

It is an extra tool in your hands.

Targeting is taught through shaping, see cons of shaping.

Capturing
Capturing is ‘catching’ the end behaviour as it happensย with yourย bridge signal and reinforcing it. Example: the classical bow looks very much like the natural behaviour of a stretch after a nap.ย ย Click and reward your horse while he is stretching. Capture the behaviour several times. Then add a cue. See also Introducing and using cues.

Pros of capturing
The most obvious pro is that it is a really fast way to get a new behaviour, since the horse is already displaying the ‘goal behaviour’.

It is a safe method to train the behaviour.

Novice trainers can use it. Timing doesn’t have to be very accurate.

Cons of capturing
The training is totally dependantย onย the horses willingnessย to performย the behaviour and the chances of the trainer being present at the time. The trainer must have a bridge signal and reward present.

It can be hard to communicate aย (new) cue to your horse. While training you may have accidentally introduced one already. ย Youย might not knowย what itย is as a horse is very perceptive of your unconscious movements.ย Thisย might be difficultย toย change afterwards.

My favourite training methods
These three are myย favourite ways of getting a behaviour. I use targeting and shaping on a daily basis.

I used capturingย to teachย Sholto theย classical bow (see picture below) and flehmen on command. Kyra’s lying down and nickering to me are also taught through capturing.

_classical bow_buiging_hippologic

Kyra’s flemenย andย her classical bow (see picture below) areย taught with shaping and targeting.

KONICA MINOLTA DIGITAL CAMERA

What is your most used method to teachย your horse behaviours?

Safe the date: Thursday March 7, 2019

Ultimate Horse Training Formula, Your Key to Succesย 

_key to success_hippologic1

  • Want to get the results in training you really, really want?
  • Want train your horse with confidence?
  • Want to learn all there is to know about training your horse with positive reinforcement?

Join this online course and participate for free every time!ย Click here

Clicker Training Mastery (advanced course) starts March 6, 2019

_Kyra_en_ik_hippologic
Sandra Poppema, B.Sc.
I help horse owners get the results in training they really, really want with joy and easy for both horse and human. I always aim for win-win!
Sign up for HippoLogic’s newsletter (it’s free and it comes with a gift) orย visit HippoLogic’s website and join my online course Ultimate Horse Training Formula in which you learn the Key Lessons, Your Key to Success in Clicker Training.
Follow my blogย  on Bloglovin

Key to Success: make a Shaping Plan

Read the article you’re looking for here: https://clickertraining.ca/key-to-succes-make-a-shaping-plan/

Sandra Poppema, BSc
Founder of HippoLogic
Enhancing Horse-Human connections through clicker training

Follow me on Facebook, Instagram or watch a video on HippoLogic’s YouTube channel.
Don’t miss out on courses and clicker tips in your inbox or get my free online course.