Key Lesson PATIENCE: teach your horse to Stand & Relax in Clicker Training

Can you teach your frustrated horse, that is mugging, dancing, sniffing your pockets and offering all his latest trick to be calm and confident in training? Yes, and here’s how!

HippoLogic’s R+ Horse Training system contains 12 Keys to Success: 6 Key Lessons for Horses (Key Lesson PATIENCE is one of them) and 6 Keys to Success for Trainers that help you give your horse Clarity, Consistency and Confidence in your own clicker training skills.

Can your teach a horse to be calm and relaxed with Clicker Training?

It’s debatable in the R+ training world, but since I’ve taught many horses to relax I believe it’s possible!

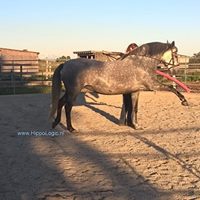
In this video you see Fionn who transformed from a very eager but frustrated horse into a calm and relaxed horse. The “AFTER” is not the end result yet! 😉 He’s already better than in the video.

Behaviour in Horse Training

Behaviour is always changing and the horse will always do what’s best for him: is mugging while standing reinforced? He’ll choose the mugging every day, just to see if it works! Even when it doesn’t he won’t give up!

Therefor it’s best to teach him Key Lesson #1: Table Manners for Horses first. Then focus on the next behaviour: Standing.

Mugging while Standing

When you’ve already taught him incompatible behaviour with mugging, and something that is DESIREABLE, you both will benefit in all your future training. The “non-mugging” behaviour (keep head straight and away from your pockets) will be default in your next behaviour, for instance Stand & Relax.


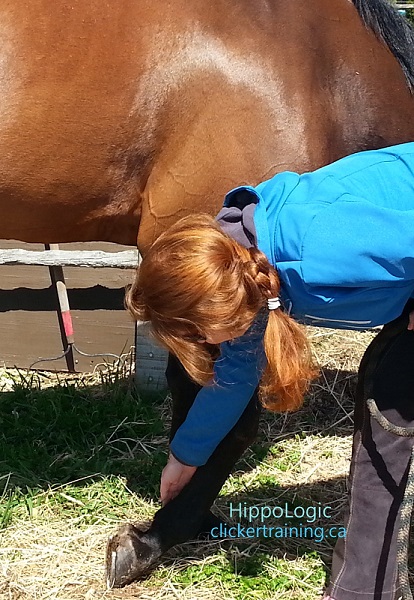
Benefits of Key Lesson Patience (Stand & Relax)

Your horse get Clarity! He’ll know what is expected from him and what behaviours are reinforced (if you do it right 😉 ). You’re building confidence in your horse and Key Lesson Patience is an EXCELLENT default behaviour:

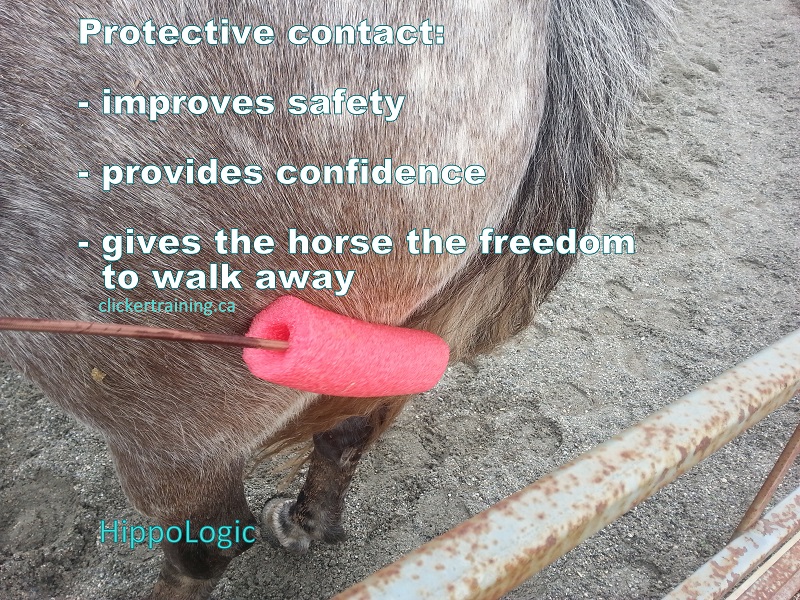
  • Safe behaviour/increases safety
  • Helps teaching your horse to be calm and wait for cues
  • It’s the best default behaviour!
  • Start laying the foundation of a two-way communication with your horse
  • Foundation of ground tying
  • Helps with mat training
  • Safe behaviour for mounting
  • Safe behaviour for when the vet comes
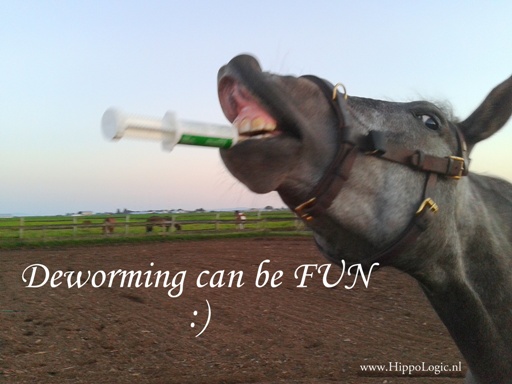
  • Safe foundation for husbandry skills: deworming, eye care, mouth inspection, taking temperature
  • Grooming
  • Tacking/saddling your horse

Incompatible with/Solves

  • Pawing
  • Wandering off
  • Starting to graze
  • Ignoring you
  • Pushing you
  • Fidgeting with his head
  • Dancing around you
  • Backing up
  • Flipping his head
  • Trying to face you (a common behaviour that takes all pressure away in NH)
  • Stressed/tense
  • Mugging for treats with tricks like kissing faces
  • Pinned ears, nipping

Aggressive behaviour

When your horse is showing aggressive behaviours, take away the cause first! Aggression is often coming from anger or fear! Do not try to stick “calm and standing still and relax” on top of frustration, anger, fear. It will backfire! Listen to your horse, figure out what he’s worried about and work on that issue first.

Once you solve the reason for his anger, fear, frustration that leads to aggression everything else becomes much safer and easier to train! When your horse shows aggression, ask help from a professional!

Do not punish your horse for aggressive behaviours because that will make it worse. Yes, you can defend yourself if necessary, and I hope you never have to! Beware you won’t get into ‘a spiral of aggression’ with your horse.

Work on Basics first, to offer your Horse Clarity in Training

All Key Lessons for Horses are foundational behaviours in Clicker Training that will help you train save, strong basic behaviours that will then automatically be ingrained in all future behaviours.

Take the time to teach your horse these 6 basic behaviours in positive reinforcement horse training:

  • 1 Table Manners for Horses: save behaviour around food and treats in training
  • 2 Patience: Stand & Relax, waiting calmly and confidently for your next cue. Increases safely and reduces frustration. Keep your horse in Learning Mode
  • 3 Targeting: the most versatile behaviour that help you train almost ANY behaviour!
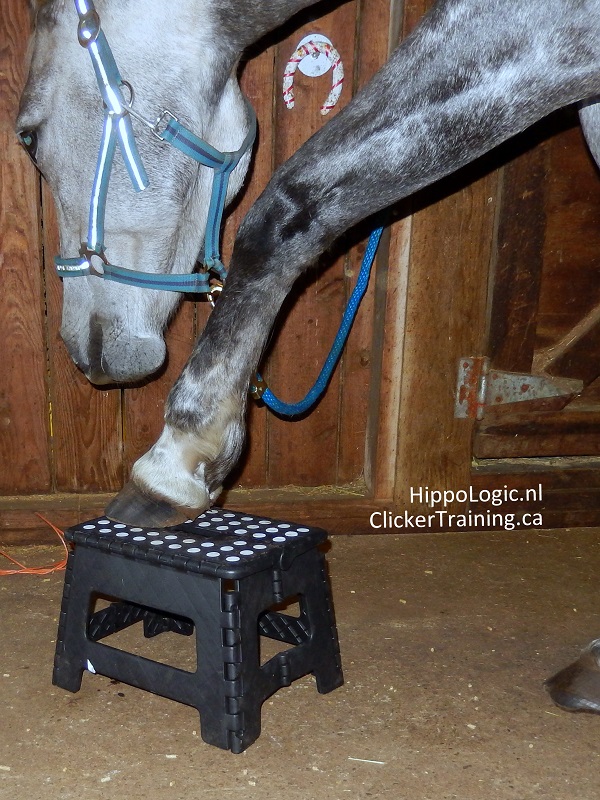
  • 4 Mat training: basically targeting the feet, offers so much clarity for your horse
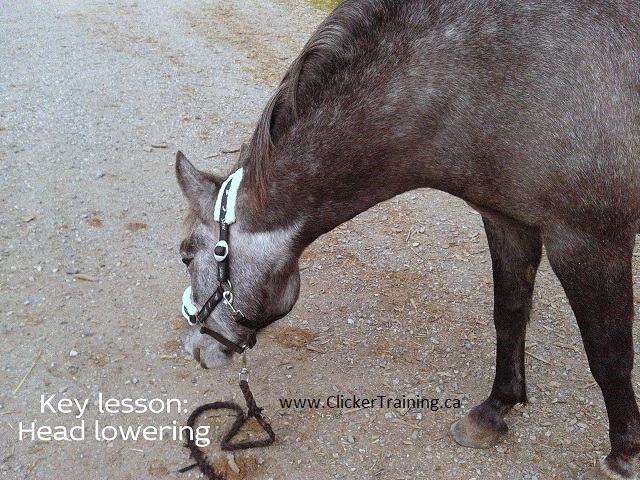
  • 5 Head lowering: can help calm your horse down, increases safety and helps your horse to encourage exploration behaviour
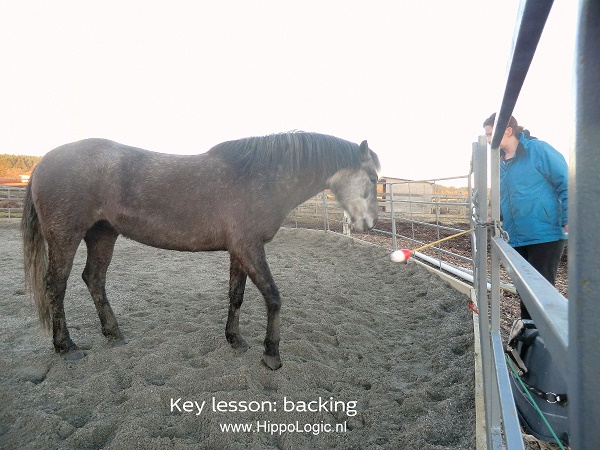
  • 6 Backing: super important for safety reasons, makes going though gates and unloading horses easy and effortlessly.

    In the next blog more about how YOU can improve your clicker training skills, stay tuned. If you don’t want to miss it: simply subscribe to my blog with the button in the side bar!

Additional reading: Teach Your Horse to Stand & Relax

Want more?

Are you teaching yourself to clicker train your horse? Are you outgrowing the trick training phase (which is super fun and a great way to lay the foundation of a two-way communication with your horse) and now you want more?

Your interest in positive reinforcement horse training is spiked and you would love to do everything you do now, but then using clicker training? This is for you!

Become a Confident Clicker Trainer

When you want to do more with positive reinforcement and feel confident training your own horse, this is the course for you!
The Confident Clicker Trainer course is a high quality, online training program that you can do yourself. You’ll become automatically confident in your skills when you get predictable results. This course is aimed at novice and advanced clicker trainers who want to make their foundation really, really strong so that they can train everything else you want, faster and easier.

Enjoy Your Horse More

When you implement more positive reinforcement in your training and daily interactions with your horse, you ‘ll develop a strong bond. You’ll enhance the communication and built mutual trust and understanding. Clicker Training is so much more than a training method!


Happy Horse training! You are the trainer!
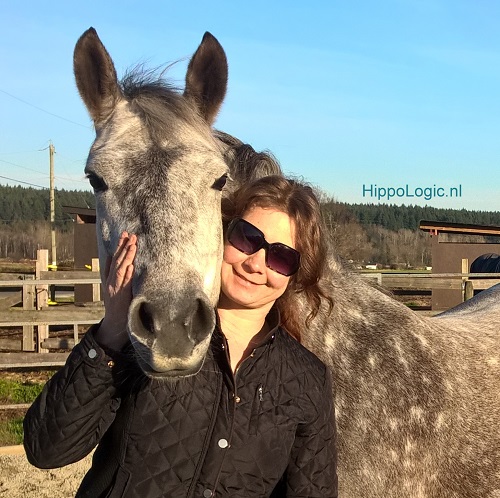
Sandra Poppema, BSc
Founder of HippoLogic and creator of the Confident Clicker Trainer course

Can you teach a frustrated horse to relax in training? Yes, you can!

Deworming Rita the (still) Unapproachable Mule

Rita, the Unapproachable Mule that I’m working with in the Donkey Refuge is making progress! I still can’t approach her so close that I can touch her, but she comes pretty close to me now.

Husbandry skill: deworming

The herd she’s in (all donkeys, she’s the only mule) needed their deworming done. Rita hasn’t been dewormed in 6 years because there is NO WAY you can approach her.

They have tried everything and even tried to sedate her in the hope they could get her, touch her or approach her, but nothing worked…

When I started with positive reinforcement (May 2022), it was really hard. I had to learn Rita’s language (I never worked with a mule before and Rita was on top of that very, very traumatized. Still is!)

Anyway, two weeks ago the herd needed to be dewormed and Rita too.

The staff makes these ‘food balls’ with soaked pelleted and sweet food, in which most animal would eat their meds.

Not Rita!

We tried putting the dewormer in these magical balls because she did take them with her antibiotics last month when she got hurt!

Rita bit into the ball and spit it right out! Yak!

I thought, why risk damaging the trust by ‘tricking’ her into eating the dewormer paste?

Here comes Key to Success #1 for Trainers: Principles of Learning & Motivation!

Instead of tricking her, I made sure that every interaction with the food ball with dewormer was positively reinforced.

I
nstead of putting the dewormer in the inside, I asked the staff to put it on the outside… (Yes, they gave me a puzzled look)The Principle is, to train Rita to accept an aversive (with positive reinforcement and choice).

Choices in Training

I gave her choices: There was more to eat than just the ball with dewormer, she got treats (normal food pellets) in other food bowls and on mats.

The aim of deworming training was simply to teach her that the smell is OK. I put food around the edible “deworming ball”

t took a while for her to approach the deworming ball, since she was unpleasantly surprised before when she bit in one of them and got a (not so nice) surprise…🤮

Next step in the deworming training

Reinforcing her to touch the food ball. Again, deworming was on the outside of this edible ball. That took also a few training sessions to teach her to touch it consistently. Goal was to make the smell (and later taste, too) familiar and to associate it with good things happening.

Then I reinforced ‘using her lips to touch’ it and also reinforced pushing it with her chin against the rim of the food bowl and so she squeezed it. At the end of our training she finally ate part of the ball!

Training after that, she ate part of the dewormer food ball, again.

Last training she ate the whole ball, at the end of our 1-hour training. The training after that, she ate it again. All of it. It took her a whole hour again!

Today she choose the food bowl with the dewormer ball first! Which was interesting!! And gave hope! Within the first 15 minutes of our training she ate the ball! WIN! 

Each ball has just a few ml of dewormer on it, but this is such a promising start!

I hope to get her dewormed within the next 3 sessions. I’ll keep you posted!!

What are YOU working on?

I would love to hear from you! What are you working on with your horse right now? I would love to get to know you. Tell me about your horse and your clicker training in the comments!

When you’re struggling with husbandry skills or have a dream behaviour that you want to train and could use some help? Consider joining our Clicker Community.

  • Personal feedback and coaching in a group! You’re not a number in the Academy: we want to know you and your horse(s)!
  • We help you develop and enhance the bond you want with your horse using force-free training
  • We teach you how to become an autonomous, confident clicker trainer that can train anything she wants!
  • We offer an awesome, supportive clicker community with like-minded horse people!

HippoLogic Clicker Training Academy

Do more with Clicker Training!

Are you a compassionate horse owner who wants to build a strong friendship with your horse? Would you like to understand your horse better and help your horse to understand YOU better? Get access to high quality online training and a fabulous, supportive R+ community in our HippoLogic Clicker Training Academy. Check out the link!

Want to do more with Clicker Training?

Join the HippoLogic Academy! I coach and support you personally getting your dream results with positive reinforcement, so that you can bond with your horse in the process. Create a connection build on mutual trust and understanding, a clear two-way communication built on love. Click the image to go access the application form ↓

Not sure? Start with a free clicker training assessment to get taste of what it feels like to work with me. When you have a specific struggle that you want to overcome, don’t hesitate to contact me.

In this assessment you’ll discover what’s holding you back from accomplishing the things you want with your horse. After our conversation you’ll know exactly what to do, in order to move forward towards your goals.

Book here

Happy Horse training!
Sandra Poppema, B.Sc., founder of HippoLogic & HippoLogic Clicker Training Academy

Join us!

Make a hoof wrapping in 5 easy steps

When Kyra stepped into a rusty nail her foot got infected. My barn manager taught me how she wraps hoofs that need to stay dry and clean.
The hoof putty was used to pull the infection and the vet gave me poultice pads to cover the wound when the infection broke through. So that’s instead of the putty.

Step 1: removing the nail

Step 2: Prepare

I gathered everything I needed to soak the hoof, dry it and wrap it before I started. These every day items are good to have in an equine first aid kit:

  • Warm water
  • Epsom salt
  • Rubber bucket to soak
  • Paper towels to dry
  • Iodine to disinfect
  • Hoof packing + rubber glove to keep hands clean
  • Poultice pad
  • Paper from a paper feed bag
  • Small diaper
  • Vet wrap (1/2 roll)
  • Duct tape (the outdoor is very heavy duty. Not in the picture)

Step 3: Soaking

In order to clean the entry wound as good as possible I soaked her foot in Epsom salt and dried it and put iodine on it. It wasn’t enough and got infected. Lesson learned.

Step 4: Preparing the packing

The packing needs to be kneaded and warmed up to form to the hoof. I used a plastic glove for that.The paper helps keep it in it’s place.

Alternative step 4

A few days later I used a poultice pad to put on the skin where the infection had broken through. These pads are nice an d thick and covered with a plastic layer on the outside.

They are decent size and I could cut them in 3 for Kyra’s hooves. So easy! I never had seen them before (no need).

Step 5: Wrap the hoof

I learned to apply 3 layers and if you do it right (and are lucky) it stays on for 24 hours. Kyra was outside in the paddock. Some days it stayed on, some days it didn’t. The duct tape is not sturdy enough. I used Kyra’s softride boots (meant for front hoof when she had laminitis) and a few days I later bought another poultice boot to cover it up.

  • Wrap the packing with a small size diaper
  • Use vet wrap to keep the diaper in its place
  • A layer of duct tape to reinforce and keep moist out

Space shoe is ready!

Now Kyra’s space shoe is ready. Only a few more pieces of Duct tape to cover up the vet wrap.

I learned so much this week. I was grateful Kyra already is really good with soaking, holding her foot up and wrapping. Preparation for emergencies is smart! You never know when you need it. I taught Kyra to keep her foot in the bucket with clicker training. I also gave lots of reinforcers to keep her foot up.

Next day….

Next blog

I hope this was useful. Please leave a comment!

In my next blog I will talk about how you can administer larger amounts of oral medication (like antibiotics) without spilling it. I learned a nice technique to do that this week. So many learnings for me this week.

What have you learned out of emergencies at the barn? I bet you have a tip that for other horse lovers.

Join HippoLogic’s Facebook group

Become a member of our Happy Herd on Facebook and get access to my Facebook LIVE’s.

Sandra Poppema, B.Sc.
Helping horse people to bond with their horse and get the results they want.
 
Get your free 5 Step Clicker Training Plan 5-step clicker training plan HippoLogic


Follow my blog with Bloglovin

Husbandry skills: hoof care (part IV)

In this series I will keep you posted on the young horse I am training in order to prepare her for the next farrier visit. I will call her A. in this blog. A was scared to let people touch her legs, especially her hind legs. She kicked out whenever she felt something touching them.

I promised to keep you updated on our clicker training sessions. We had another session since my last post. Progress might seem slow, but I know from over a decade of clicker training horses that slow is the way to go.

Improvise

Due to circumstances I had to improvise last time and it went well. This time I started training in her stall, without protective contact (a barrier). I started the lesson with a repetition of where we stopped successfully last time we trained. With her left front leg. I stroked her shoulder and clicked her for standing with 4 hooves on the ground.

_Husbandry_hoofcare_hippologic2

The next step was stroking with my hand along her leg and clicking for lifting her leg. A did so well! She remembered exactly what she had to do. She would hold her leg up (by herself, without leaning on me) for a second. I made sure I clicked very soon, so it wouldn’t turn into a jambette this time.

Her other front leg went well too. I decided to try her hind legs. She is used to me stroking her hind legs while working with protected contact. But today, without the fence between us she was startled and she kicked straight out. Not to hurt me, if she wanted she could have! She is so fast. This was clearly too much for her. I was ‘lumping’ instead of splitting.

Solution

Back to splitting the behaviour again. I used my pool noodle on a stick again and clicked and reinforced heavily for ‘standing still’. I stroked her bum, hind legs and then her fetlock. Each time she stood still I clicked and reinforced. I made sure I kept her below threshold, so that I didn’t trigger the urge to move away or kick out. I studied her face for signs of tension: wrinkles around her eyes and nostrils, eyes opening further or her head going up a few millimetres. None of that.

One step further

_Husbandry_hoofcare_hippologic1

The next step was to repeat the same sequence of touching, but using my hand instead of the pool noodle. Hand on bum: OK. Click and reinforce. Hand on hind leg: OK. Click and reinforce. Then a click and reinforce for something very easy and relaxing for her: touching her withers. Then back to her hind leg and stroking a bit lower, her gaskin and I could even touch A’s hock while she stayed relaxed!

Feeling successful

_oog_hippologic

This was a wonderful moment! These are the moments you feel successful and you want to do ‘one more thing’. That is usually my cue (the thought of that I can take it one step further) to stop. She was so relaxed and confident, it was really tempting to do a bit more that day, but I didn’t!

The reason is that when I started touching her hind legs this session she was afraid. A few minutes and a few clicks and reinforcers later she was OK. I didn’t want to ruin that for her!

It was already a successful training: lifting both of her front legs without a jambette and touching her left hind leg with my hand while she was confident and relaxed enough to stand still. Especially the staying relaxed part is really-really important!

Read more:
Preparing your Horse for the Farrier with Clicker Training
Husbandry skills: Hoof care, part I
Husbandry skills: Hoof care, part II
Husbandry skills: Hoof care, part III

Sandra Poppema
Are you inspired and interested in personal coaching or do you want to sign up for the next online course ‘Set Your Equestrian Goals & Achieve them‘, please visit my website
Follow my blog with Bloglovin

Husbandry skills: hoof care (part III)

achterhoeven onbekapt ongeslagen 13 maanden oud

In this series I will keep you posted about the young horse I am training in order to prepare her for the next farrier visit. I will call her A. in this blog. A was scared to let people touch her legs, especially her hind legs. She kicked out whenever she felt something touching them.

In the previous blog I described the progress we made so far. I have only had one more session between this blog and the last one. That means that A. hasn’t been (clicker) trained for two weeks. Usually a horse benefits from a break in training.

Improvisation

In positive reinforcement training you have to improvise often. If something has changed in the circumstances we are used to in training, we can’t expect the same results. This is called a ‘context shift’.

Read more about context shifts in this article Setting your horse up for success: context shift

Horses and other animals, find it often hard to generalize. If we can touch their body with a pool noodle in the stall, it doesn’t necessarily mean that the horse knows what to do when we are stroking her with a pool noodle in her paddock or in the arena.

Last training session the circumstances changed: it was raining so A.’s neighbours were not outside, but stayed in her stalls. In previous training I used the fence between the stalls as a protective barrier between me and A. This time that was not an option: standing in the stall of a clicker trained horse B. while clicking and feeding horse A.

I pondered a moment about the possibilities. Since A. is used to being haltered and isn’t a dangerous horse, I chose to halter her and go train her in her stall.

The click

Horse B. was really determined to become a part of the training session, so I had to improvise again. Every time I clicked she expected a treat and she became a bit frustrated that the clicks weren’t meant for her.

KONICA MINOLTA DIGITAL CAMERA

I offered horse B. a handful of pellets, my usual food rewards and gave her my end of session signal, to tell her that she wasn’t going to get any clicks. I chose to switch the mechanical click of the clicker for a very soft tongue click instead to train A. I quickly introduced her to the new marker signal. A. is very smart and quickly understood that my tongue click was an announcer for a treat.

I noticed that B. didn’t recognize the new marker and she went back to her hay to munch a bit. Time to start A.’s training.

There were also a few other things that were different this morning.  I had haltered A. this time, there wasn’t a fence between us and we were standing in the center of her stall, in order not to be too close to the other horses. On top of that I also forgot my pool noodle on a stick.

How to handle a context shift

Because of all the changes that day I started repeating a lot of the previous lessons in this new setup: I started with touching her shoulder again. She didn’t move and she stayed relaxed so I tongue clicked and reinforced. Then I stroke her and let my hand move more towards her front leg. She was OK with that too: click and reinforce.

I moved my hand very slowly and I made sure I clicked and reinforced a lot. A.  understood the exercises quickly. Within a few (tongue) clicks she lifted her front leg all by herself! It was just a fraction of a second, but worth a click and a handful of food.

jambette

After a break we went on with lifting her front leg. Because I had given her a jackpot for lifting her leg she wanted to earn more food and she enthusiastically lifted her leg and swung it forward. Click & treat. I didn’t expect her to swing that leg to the front so my timing was exactly when she was performing a perfect jambette (like the picture of Kyra of the left). Oops.

The next try she did it again so I had to click much sooner: when she just lifted her leg from the floor. We will work on duration another time. I ended the training after lifting each of her front legs, without getting a jambette.

Related blogs:
Preparing your horse for the farrier with clicker training
Husbandry Skills: Hoof Care (part I)
Husbandry Skills: Hoof Care (part II)

Sandra Poppema, B.Sc.
Are you inspired and interested in personal coaching or do you want to sign up for the next online course ‘Set Your Equestrian Goals & Achieve them‘ (starts Friday), please visit my website

Follow my blog with Bloglovin

Husbandry skills: Hoof Care (part II)

In this series I will keep you posted about the young horse I am training in order to prepare her for the next farrier visit. I will call her A. in this blog. A. is scared to let people touch her legs, especially her hind legs. She kicks out when she feels something touching her hind legs.

In my last blog I wrote how I started her training. She is now used to the clicker. She knows that a click is an announcer of good things coming her way: appetitives (in this case treats). She understands my end of session signal that tells her that there are no more treats to be earned.

Training Tools

Besides a clicker and treat I use a target stick that I made from a piece of pool noodle on a stick. I chose a pool noodle because they are soft, light weight and cannot hurt the horse accidentally.

I did not start with nose targeting this time. I used the target to touch A. The aim is to teach her that touching her hind legs is safe, will lead to appetitives (something the horse likes to have, such as a treat) and that she is in control (no force or coercion) about accepting her body to be touched. For obvious safety reasons I still work with protective contact. A. is allowed to kick the pool noodle in case I go too fast and nobody will get hurt.

Introducing the Pool Noodle

I already knew A.’s favourite spots to scratch her, so I kept those in mind while training.

I introduced the pool noodle by holding it in front of her and click and treat her for looking at it. I am still working with protective contact (a barrier between her and me). She wouldn’t touch the target in the beginning.

Then I held it a bit more to the left on my side of the fence, still not too close, and clicked and reinforced A. for ‘standing still’. Then I held it a bit more to the right, near her withers and so on. Clicking and reinforcing every little step in order to give her confidence that standing still is what I want from her. Nothing else.

Little by little I could hold the target closer and closer until she could touch it. I haven’t clicked and reinforced much for touching with her nose or sniffing since my goal is not to teach her to touch the pool noodle with her nose. She wasn’t afraid of the pool noodle target by the way, just curious.

Training logbook

_Husbandry skill_hoof care_hippoLogic

After 3 sessions of each 5 minutes I could touch her with the pool noodle on the withers, her chest/throat/mane and her bum. If she moved away, even a little weight shift, I went back to the previous steps when she was still relaxed and OK with it. I would take a step back and continue a bit slower. In positive reinforcement training you mark the desired behaviour. If A. wants to move away that is OK. I just wait until she is ready to come to me and present her body close to the fence so I could touch her with the pool noodle again.

I don’t keep the pool noodle on her body until she stops moving. That would be negative reinforcement (strengthening the behaviour (standing still) with taking away the aversive (the thing she wants to escape).

I know it took 3 sessions because I keep a training logbook. I keep track of time, how many sessions we do each day, how long the sessions are, how long the breaks are (usually 2-3 minutes), where we train (A. lives in an in/out stall and sometimes we train outside, sometimes inside) and how much progression we made and also what startled her or what body parts he becomes anxious. I also wrote down the next steps of her training.

I end every session with an end of training signal. Sometimes A. keeps standing aligned to the fence in the hope of getting scratches, sometimes she walked right back to her hay to eat.

In the next blog I will tell you more about how A.’s training is progressing.

Read the previous blog: Husbandry skills: hoof care (part I)

Sandra Poppema, B.Sc.
Are you inspired and interested in personal coaching or want to be a part of my HippoLogic Clicker Training Academy in which we have weekly group clicker coaching, clicker courses and a private online R+ community take action! CLICK the links to learn more.

Hoof care, teach your horse to lift up his feet (part I)

How to teach your horse to lift his legs. so you can feel safe cleaning his feet.

  1. Encourage your horse to do a weight shift. Reward taking off weight of his leg with a click and treat
  2. Reinforce lifting the leg up
  3. Support the leg, without holding onto it
  4. Guide the leg down
  5. Build on duration and keeping his foot up in the air
  6. Add your cue
  7. Fade out clicks and treats
  8. Train the next leg

What are Husbandry Skills?

The term ‘husbandry skills’ refers to all the behaviours you want to teach an animal in order to take care of them safely. Daily  husbandry skills are haltering, leading, grooming, cleaning hooves, cleaning nostrils, eyes and ears and so on. Medical procedures like drawing blood (important in zoo animals) or administering medication (injections, oral medication, ointments) are also a part of husbandry skills.

In this blog series I will share with you how I train a young horse to lift her legs for hoof care with positive reinforcement (clicker training).

Young horses

Preparing for a hoof stand by HippoLogic
Preparing for a hoof stand.

At the SPCA barn I ‘m training a young horse to lift her legs for hoof care and trims.

The farrier did a good job last time, but his time was limited to do the trim due to the horse.

The mare was very scared and stressed. She is not yet properly trained to lift legs and let us clean her hoofs, let alone lift her legs long enough for a trim.

My goal is to have her much better prepared for a trim next time. I would like her to lift her legs on cue and hold her legs up herself (no leaning into the farrier). I want her to be confident and stress free during a trim.

Building a relationship and trust first

This horse, let’s call her A. is young and she is really scared to be touched, especially on her legs. I introduced myself to her with offering scratches over the fence. She is really itchy at the moment due to shedding, so scratches are a good reinforcer to her right now. The best way to start a relationship is to start giving.

Protective contact

In a few sessions A. figured out how to ‘call me over’ (Starter button) so I would scratch her: if she aligns herself with the fence I come over and scratch her. I started with her chest area, now A. also let me scratch her withers, under her mane, her chest and her bum.

She knows that she can walk away and I don’t (can’t) follow her. She is in control: she can tell me where I need to scratch her and for how long. She even is in control of how much pressure she likes in a certain spot by pushing more or less into my hand.

End of Session signal

I taught her the end of session signal: I show her my two empty hands and say ‘All done‘.  It is interesting to see that she now immediately goes back to her hay if I give her my end of session signal. She knows the reinforcers (attention, scratches) will stop now.

I find it very important to have a way to communicate to the horse when and when not to expect reinforcers from me. It helps prevent mugging and turning your horse into a pushy horse.

Next step: introducing the clicker_hondenclicker

Now I have a bit of a positive relationship and established some rules (start session, end session, she learned that she can influence her training) and I can take her training to the next level: introducing the bridge or marker signal, the click.

I will keep you updated about A.’s training in the next blog.

Read more:

Husbandry skills: Hoof Care (part II)
Prepare your Horse for the Farrier with Clicker Training

Happy Horse training!
Sandra Poppema, B.Sc., founder of HippoLogic

Are you inspired and interested in personal coaching in a group or do you want to have access to online clicker training courses and a fabulous, supportive R+ community, then join our HippoLogic Clicker Training Academy. Apply today!

Key Lessons: Head Lowering & Backing

In my previous post I talked about the key lessons safe behaviour around food and taking the horses’ emotions into account during training.

Today’s two key lessons are natural behaviours and therefor easy to put on cue: head lowering and backing.

Head lowering as key lesson
Although it is not proven that lowering the head calms a horse down, it still is an indicator if the horse is relaxed or not. How? A nervous horse keeps its head up, if a horse is startled the first thing he does is lift up his head, if a horse hears a strange sound he will… yes, lift his head up to listen. Horses always lift their heads up just before they run. So in a way it is an indicator for nervous behaviour.

__keylesson_head_low_clickertraining_1

Teaching a horse to lower his head on cue comes in handy if you have a tall horse to halter or bridle. If a horse is scared by an object on the ground, you can ask your horse to lower his head in order to invite him to investigate the object. If a tall horse has to lower his head in order to prevent bumping it, it is handy if you have this on cue. There are so many situations in which it is handy to ask your horse to lower his head.

Head lowering can also help during medical care, like eye care or inspecting ears or during deworming. Head lowering is also a good exercise under saddle in all gaits. Head lowering can also help in teaching your horse a specific cue to graze during a trail ride or while hand grazing your horse.

Head lowering as default behaviour
Head lowering is a good behaviour to allow as ‘default behaviour’. A default behaviour is a behaviour you can teach your horse to do whenever he doesn’t know what to do or if he wants your attention. Head lowering is a safe behaviour. You can establish a default behaviour by reinforcing the behaviour with and without a cue.

Key lesson Backing
Backing is a behaviour that helps increase the safety in many ways. If you can ask your horse to back up he can’t reach you, so he can’t bite, step on your toes or push you around.

_ keylesson backing hippologic clickertraining

Backing is a valuable exercise in safe food handling skills: if you teach your horse to backup if you (hand) feed him, he can’t get the food out of your pocket or dive into the bucket your holding.

If you teach your horse to backup first if you open the stall door, he will wait for the bridge and reward instead of pushing you over and walking out of his stall. What about unloading your horse from a trailer? Backing is essential in some trailers.

Last but not least, backing is also a good exercise to help your horse become more athletic, in hand and under saddle.

Links to other key lessons

Thank you for reading. Let me know how what your favourite key lesson is and why.

Ultimate Horse Training Formula, Your Key to Success 

_key to success_hippologic1

  • Want to get the results in training you really, really want?
  • Want train your horse with confidence?
  • Want to learn all there is to know about training your horse with positive reinforcement?

Join this online course: Click here

_Kyra_en_ik_hippologic
Sandra Poppema, B.Sc.
I help horse owners get the results in training they really, really want with joy and easy for both horse and human. I always aim for win-win!
Get your FREE 5 Step Clicker Training Plan on HippoLogic’s website.

Take action. Start for free!

Book a free 60 minute Discovery Session to get a glimpse of a new future with your horse. In this conversation we’ll explore:

  • Your hopes and dreams and goals so that we can see what’s possible for you and your horse

    Key to Success in Horse Training

    Your Key to Success

  • Where you’re now, where you want to go and which path is right for you
  • What’s holding you back so you can make a plan to get these hurdles out of your way.

At the end of the call I’ll give you some ideas and advice for your next step and if it looks like a fit, we can explore what it looks like to work together.

Simply check the best time for you in my online calendar and click to reserve your free call today.

Follow my blog  on Bloglovin

5 Tips to Expand your Horse’s Horizon

We have all encountered times when we think “Now what?” at the barn. Maybe you have already reached all your equestrian goals, maybe your horse became sick and needed rest, maybe you got injured, maybe you just bought a young horse, or a senior horse… We all need inspiration if we don’t know what to teach our horse next.

#1 Horse Agility (HA)
In HA you have to navigate your horse through an obstacle course while focusing on clear communication and positive 
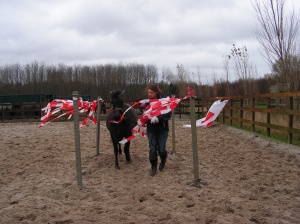
horsemanship. Horse and handler are both on foot. Horse Agility can help build a very close relationship with your horse and it keeps your horse’s mind working constructively. Skills developed in HA are very useful in daily routines as well as in new and possibly scary situations. You can even enter online competitions these days where you send in a video.

#2 Trick Training (TT)
TT is a great way to improve the relationship with your horse. You become aware of your horses intelligence and it is a fun way to spent time together. There are many simple tricks that are suitable for horses of all ages, like smiling or playing fetch. Some exercises are beneficial and can increase the horses strength and flexibility like the classical bow or the back crunch._classical bow_buiging_hippologic

#3 Training husbandry skills
If your horse already knows a lot of tricks, you can start improving your husbandry skills. Ever thought of teaching your _dewormingcanbe_
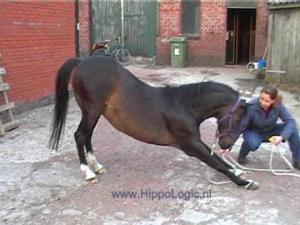
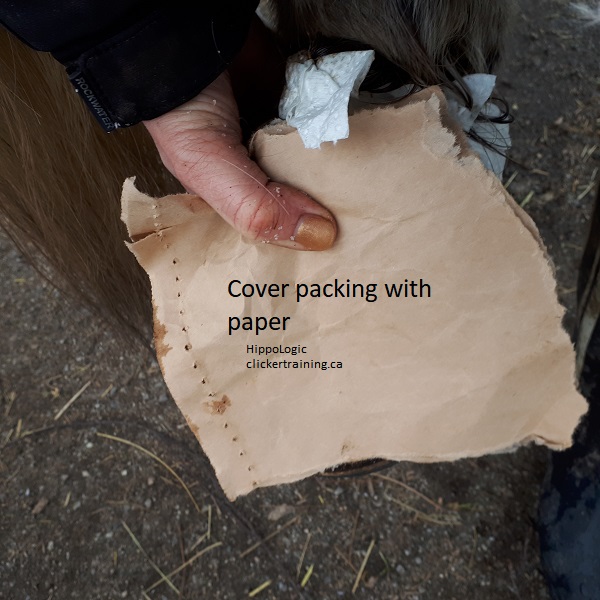
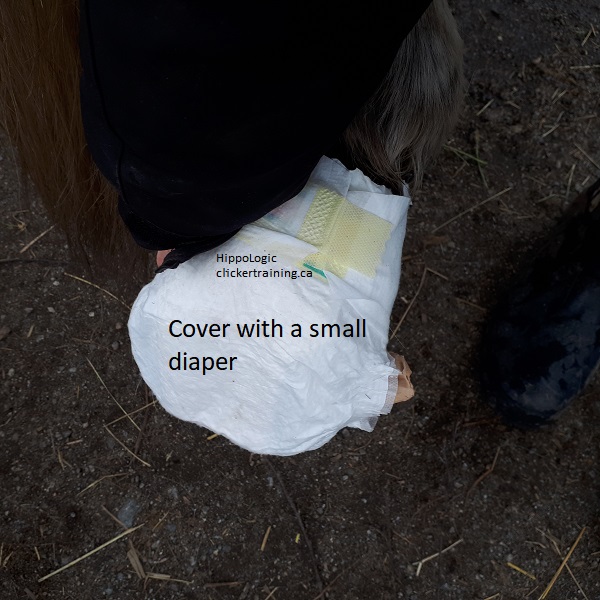
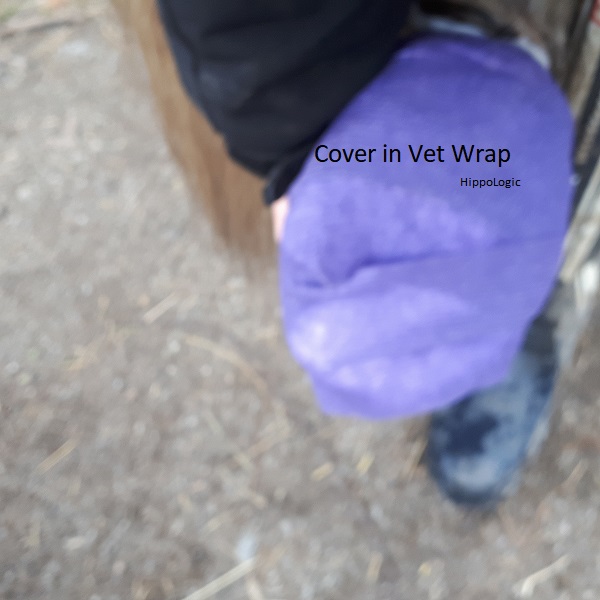
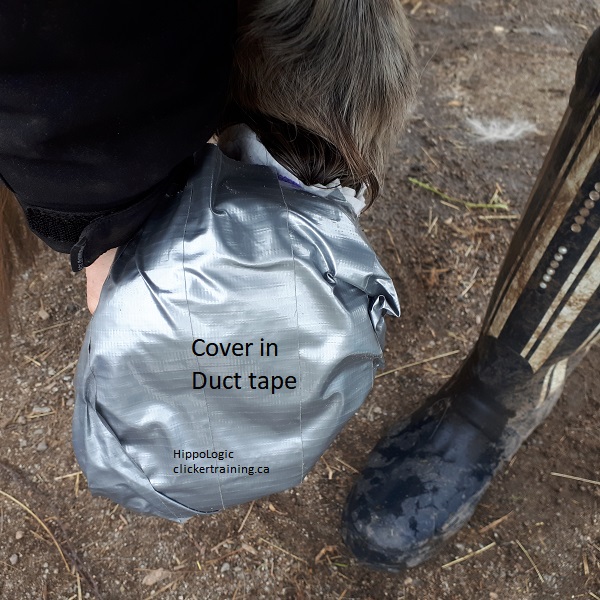
horse how to be dewormed easily or preparing him for oral medication you might need to give him some day? Teach him to accept eye drops or ointment, practice hoof trimming, braiding, taking your horses temperature, teach him to stand in a bucket of water in case you need to soak his feet. The possibilities are endless and you never know when these skills come in handy.

#4 Trailer loading
Best way to train this is if there is no goal or time limit yet. Read here the 4 reasons to start practising trailer loading today. If you don’t own a trailer, this is worth renting a trailer for.

#5 Water training
There are so many situations in which water is involved. During the summer months you can have fun water proofing your horse. _soaking feet in water bucket_horse training_hippologic
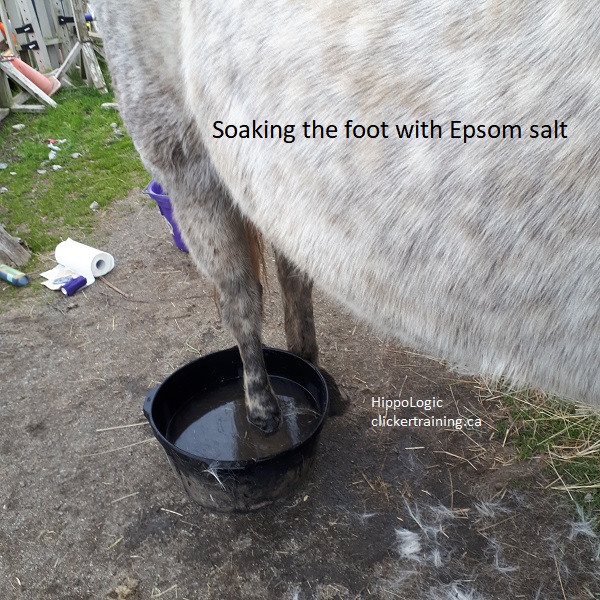
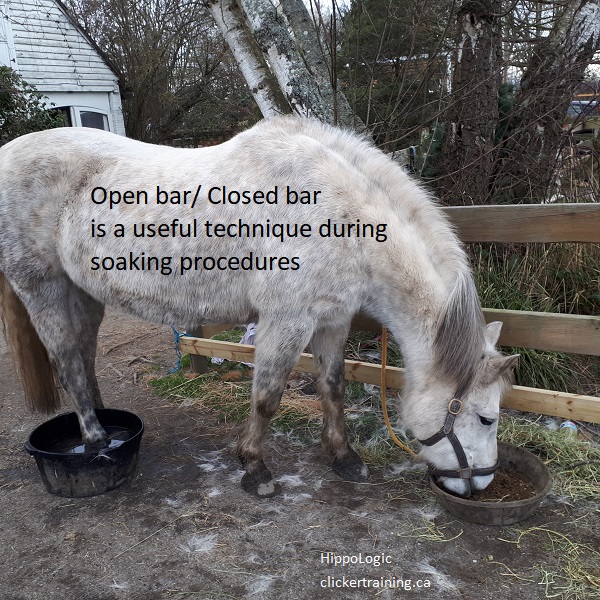
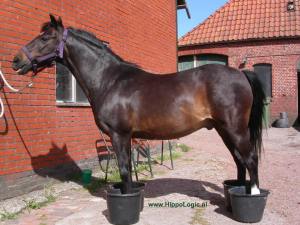
Think of soaking hooves in a bucket, hosing down your horse, crossing water (river, water splash, muddy puddles), water obstacles in HA, going for a swim with your horse, spraying your horse with a plant spray and so on.

I hope I have given you some ideas to expand your horizons. Have fun!

Sandra Poppema
Follow my blog with Bloglovin

Deworm your Horse in 6 Easy Steps

_dewormingcanbe_Years ago deworming meant stress for me and my first pony. Sholto was not really hard to deworm, but I had to be cautious. He could move his head down in a split second and sometimes that meant that I pinched the syringe in his palate. Or, I emptied the syringe while he was moving his head sideways and all the dewormer paste squirted in the air because the syringe was sticking out of his mouth on the other end.

When I started using clicker training my mind was focused on teaching Sholto tricks. It never crossed my mind to use clicker training to teach my horse things like ‘happily accepting a deworming treatment’.  For the World Equine Clicker Games 2013 I made a video about easy deworming with my current horse Kyra.

Targeting the syringe
Kyra had already mastered the key lesson ‘targeting’. So she knows that touching an object on my cue is rewarded. I started using a cleaned old dewormer syringe as a target.

Session 1: touch the syringe. Some horses have very negative associations with dewormers and for those horses ‘looking at the syringe’ could be the first step.

Desensitize the corner of the mouth
Session 2: In order to empty a dewormer in a horses mouth, you have to empty it at the back of their tongue. The easiest way to enter their mouth is in the corner, where they have no teeth. The horse must accept the syringe touching the corner of his mouth.

Accept the syringe
When Kyra accepted the syringe against a corner of her mouth, it was time to take the third step in this training process. Putting the syringe in her mouth. I use the verbal cue ‘open’.

I always let Kyra come to the syringe to test if she doesn’t think the syringe is an aversive.

Accepting a substance
Step 5 is getting the horse to swallow the paste. Often the paste is a surprise to the horse, so you can train your horse to be ready for it.

I tested first if Kyra would like applesauce. She wasn’t crazy for it, but she ate it. Good enough for session 4: accepting a substance out of the syringe.

I use a cue word to warn Kyra ‘something is coming’. I don’t want to surprise her with something with a bad taste.

The real thing
The sixth step of this process was the real dewormer. Because a lot of rewards were involved in this training, Kyra doesn’t have negative associations with the deworming syriche. The syringe is now associated with good things (clicks and rewards).

I never expected that it would become this easy. Now I can deworm Kyra without a halter and without any stress.

Every time before I deworm Kyra I start with a short reminder session with a few clicks and rewards.

Of course you can also try to put the dewormer paste in a sandwich and just feed it to your horse. I’ve seen that working with some horses, too.

Here is my One minute deworming video:

If you think this is a blog that someone can benefit from, please use one of the share buttons  below. Or post your comment, I read them all!

Or simply hit the like button so I know you appreciated this blog. Thank you!

Join our Community!

  • Are you looking for professional positive reinforcement advice?
  • Do you want an affordable program?
  • Do you want to turn your equestrian dreams into reality, but you don’t know where to start?

If you have answered ‘Yes’ to one or more of the above questions look into one of the online programs HippoLogic has to offer.

Join our community for online positive reinforcement training tips, personal advice and support in training your horse.

Shape the community

If you’re interested to become a member of the HippoLogic tribe, please tell me what you want in this short questionnaire. Thanks a lot!

HippoLogic.jpg
Sandra Poppema, B.Sc.
I help horse owners get the results in training they really, really want with joy and easy for both horse and human. I always aim for win-win!
Sign up for my newsletter (it comes with a gift) here: HippoLogic’s website.

Take action. Start for free!

Book a free 60 minute Discovery Session to get a glimpse of a new future with your horse. In this conversation we’ll explore:

  • Your hopes and dreams and goals so that we can see what’s possible for you and your horse

    Key to Success in Horse Training

    Your Key to Success

  • Where you’re now, where you want to go and which path is right for you
  • What’s holding you back so you can make a plan to get these hurdles out of your way.

At the end of the call I’ll give you some ideas and advice for your next step and if it looks like a fit, we can explore what it looks like to work together.

Simply check the best time for you in my online calendar and click to reserve your free call today.

Follow my blog  on Bloglovin