5 Useful Techniques to prepare your horse to Vet Visits

We hope this never happens, but it does. Horses get into accidents, fights, and other trouble. If you’ve been long enough around horses you know that crazy stuff happens. No matter how careful you are… Equine first aid is a necessity for all horse owners.

Rusty nail
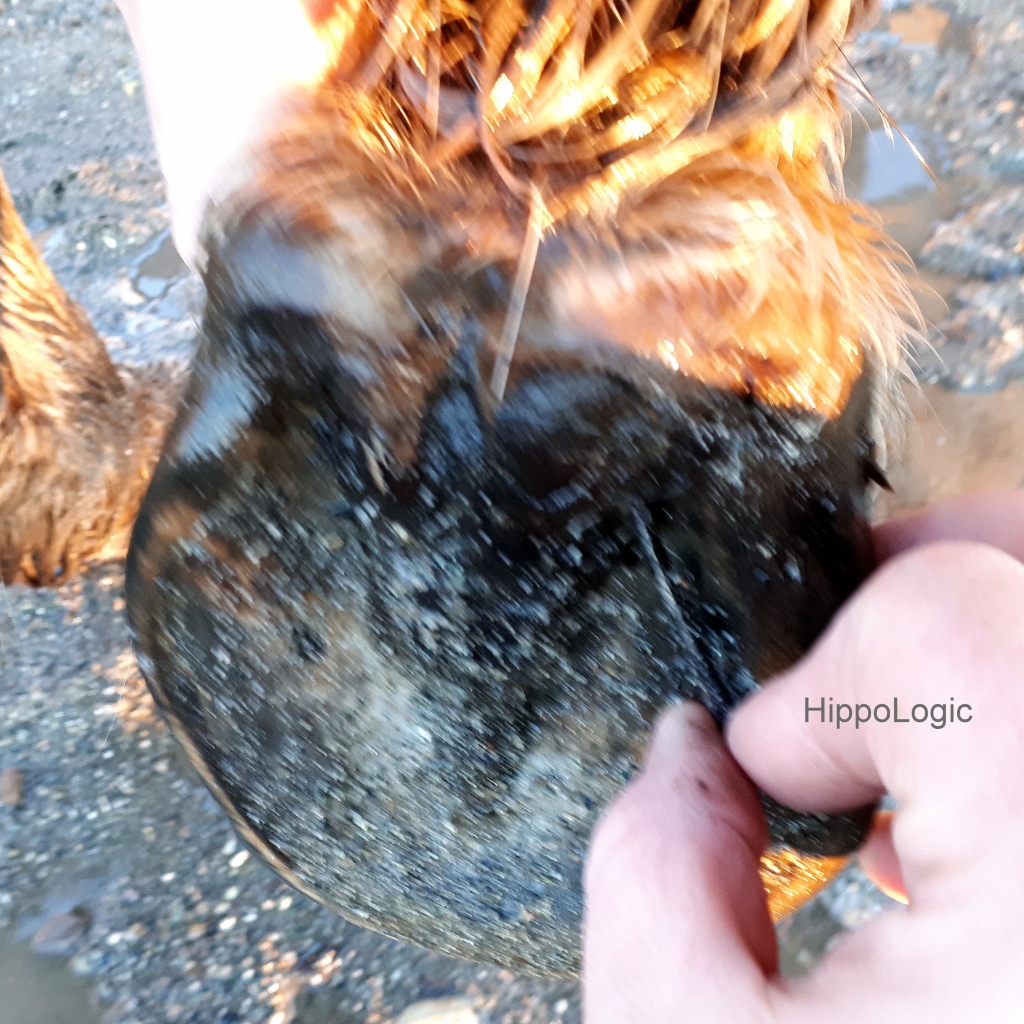
Kyra stepped into a 2 inch (5 cm) rusty nail on Saturday. She was lame and I discovered the nail when I rinsed the mud off her leg and foot with cold water.

It wasn’t in her foot all the way, but a good 1,5 – 2 cm. Not straight upwards luckily.

Hoof wrapping
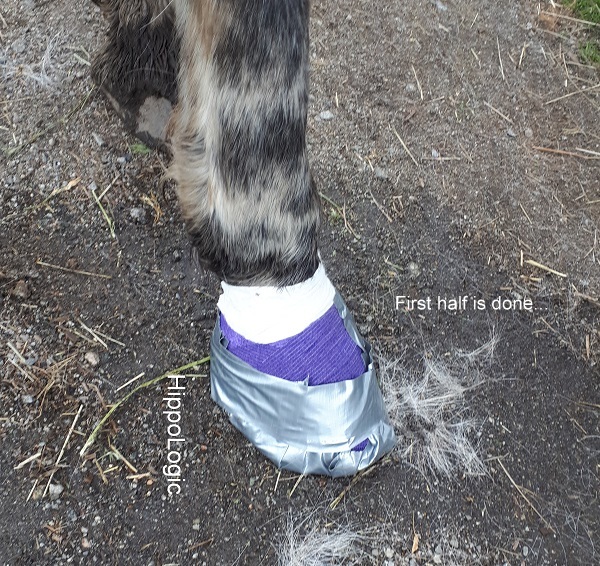
When the nail was out (I just pulled it out) immediate relief from Kyra. Then I got a quick lesson in hoof wrapping from my barn manager. One of the perks at boarding out and have experienced horse people around.

Vet care training for horses
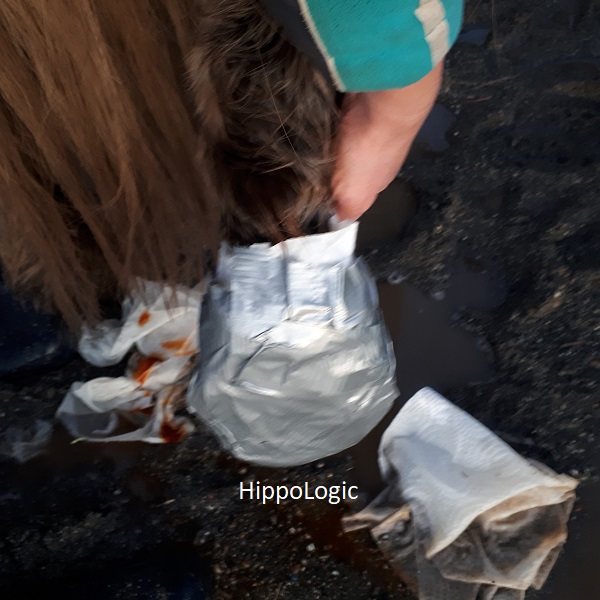
I have had “vet care training” since day 1 in my training program. Kyra came wounded to me. So she could already be hosed off, put her foot in a bucket with water and lift her legs.

You don’t want to start training these kind of things in an emergency!

Vet visit

When the vet came Kyra behaved so nicely. When she pushed on the wound Iused the open bar/closed bar technique and Kyra really appreciated it! She didn’t fight although it was very clear she was in much pain! She didn’t kick and let the vet do her work. Wow, that’s such a great feeling! Safety for everyone involved and the best treatment (because the horse lets the vet).

Be prepared!

Prepare your horse before you need it! Trailer loading, rinsing off legs (up until 10 minutes), injections, training for calm behaviour and standing still for longer periods of time (up until 10 minutes) are very helpful!

Useful techniques in vet care training

Techniques you can use for vet care training:
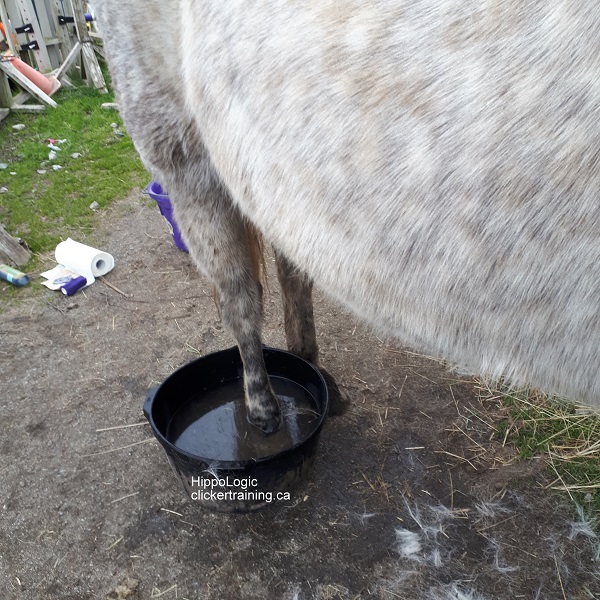
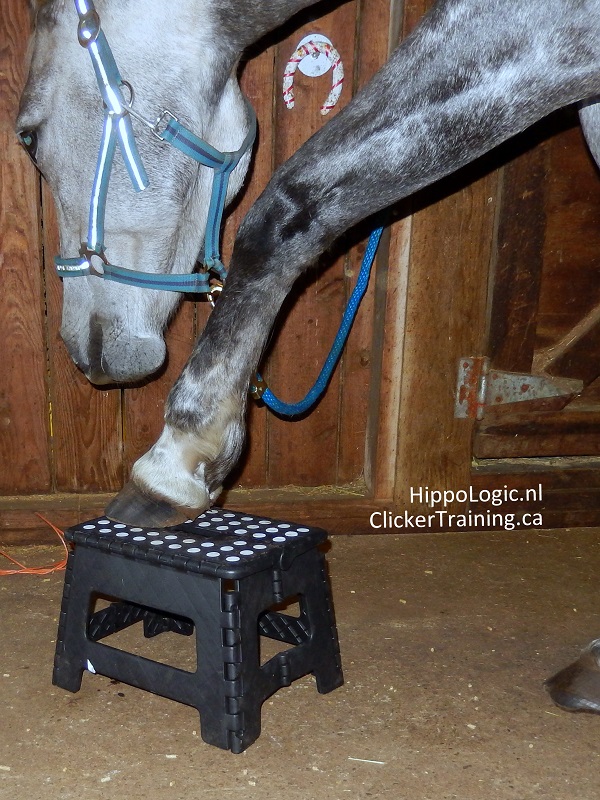
  1. A tiny bit of moulding/molding can help teaching your horse to stand in a bucket (rubber pan). It can be hard to free shape it so that they step into the pan themselves, especially with their hind legs.
  2. Duration. In vet care procedures ‘duration’ is so important. In our minds 10 seconds seem very short, but we also know when we are in the dentist chair without freezing and the drill drills 10 seconds, it’s suddenly ver, very long. Since horses don’t know when we stop with unpleasant procedures it’s even more difficult for them. They really have to trust you!
  3. Start button behaviour. Teach a behaviour so the horse can indicate: ‘I am ready.You can do what you need to do now.‘ Eg teach them to touch a target.
  4. Stop button behaviour. Teach a behaviour so they can indicate ‘Stop the procedure.’ You can teach them to touch a different target than you use for the start button behaviour.
  5. Open bar/closed bar. This is a great technique if the horse is not clicker trained or not prepared well enough. It also helps in quickly building duration. You ‘open the bar’ as soon as the behaviour starts. For instance putting the hoof into the bucket of water, holding up their hoofs for dressing or farrier work. When the horse pulls back, you let go of the foot (if possible!) and stop feeding: you ‘close the bar‘. You ‘open the bar‘ again and start feeding as soon as the horse offers the desired behaviour. The reinforcers must be high enough value to make it worthwhile. If you’re building duration a food reinforcer that they have to chew on long(er) is a good choice. Eating also distracts from the procedure and if they stop chewing with food in their mouth it can be an indication of increased stress or worry.

Make a good hoof wrap out of duct tape

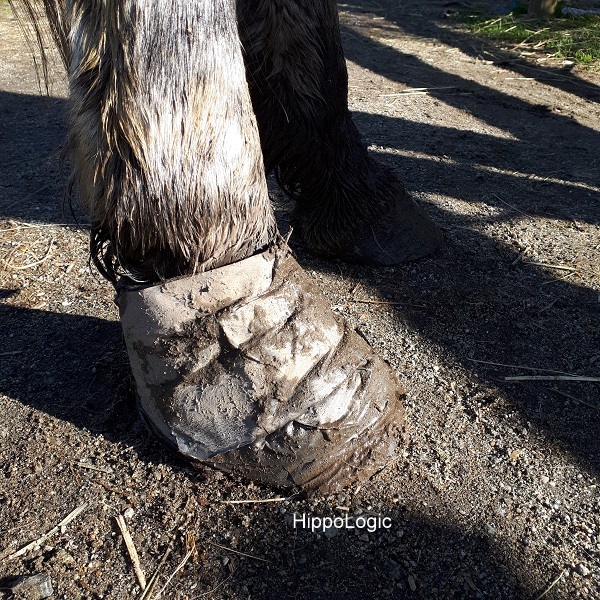
In the next blog I will show you how I make a ‘space shoe’ out of duct tape and other items to keep her foot clean and dry in the mud. I took lots of photos and made videos of our training. Here is one of Kyra’s space boot the next day. It kept well in the mud.

Keep updated by clicking ‘follow this blog’ in the side menu.
Compassionate horse owner

Are you a compassionate horse owner who wants to build a strong friendship with your horse? Would you like to understand your horse better and help your horse to understand YOU better? Get access to high quality online training and a fabulous, supportive R+ community in our HippoLogic Clicker Training Academy. Check out the link!

Ready to take your Clicker Training to the next level?

Join the HippoLogic Academy! I coach and support you personally getting your dream results with positive reinforcement, so that you can bond with your horse in the process. Create a connection build on mutual trust and understanding, a clear two-way communication built on love.

In 2024 the focus besides giving you a solid foundation is R+ Movement Training: Exercise your horse with positive reinforcement and transform your WHOA-horse into a GO-horse or get your Fat Horse Fit in a Few Months. Like all good things, learning a skill takes time. Therefore you’ll get one year personal support in the HippoLogic Academy.
Click the image to go access the application form

Not sure? Start with a free clicker training assessment to get taste of what it feels like to work with me. When you have a specific struggle that you want to overcome, don’t hesitate to contact me.

In this assessment you’ll discover what’s holding you back from accomplishing the things you want with your horse. After our conversation you’ll know exactly what to do, in order to move forward towards your goals.

Book here

Happy Horse training!
Sandra Poppema, B.Sc., founder of HippoLogic & HippoLogic Clicker Training Academy

Join us!

Husbandry skills: Hoof Care (part II)

In this series I will keep you posted about the young horse I am training in order to prepare her for the next farrier visit. I will call her A. in this blog. A. is scared to let people touch her legs, especially her hind legs. She kicks out when she feels something touching her hind legs.

In my last blog I wrote how I started her training. She is now used to the clicker. She knows that a click is an announcer of good things coming her way: appetitives (in this case treats). She understands my end of session signal that tells her that there are no more treats to be earned.

Training Tools

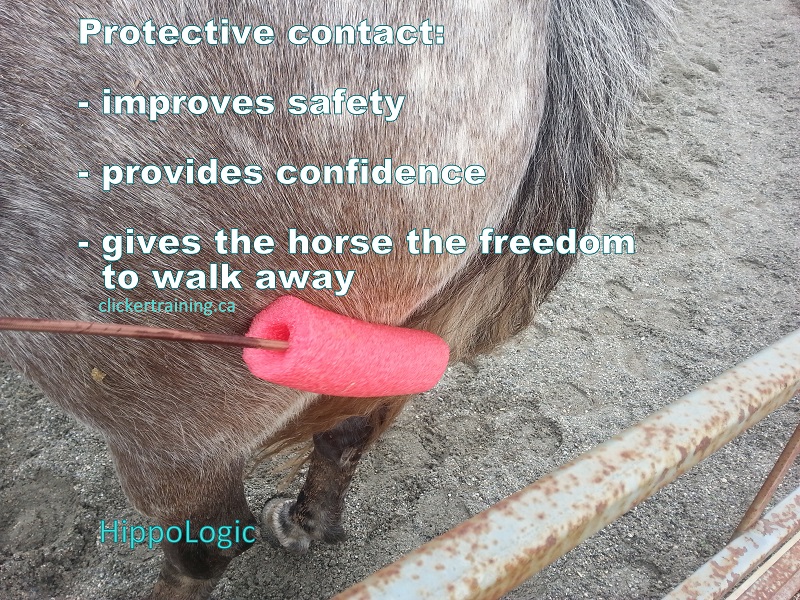
Besides a clicker and treat I use a target stick that I made from a piece of pool noodle on a stick. I chose a pool noodle because they are soft, light weight and cannot hurt the horse accidentally.

I did not start with nose targeting this time. I used the target to touch A. The aim is to teach her that touching her hind legs is safe, will lead to appetitives (something the horse likes to have, such as a treat) and that she is in control (no force or coercion) about accepting her body to be touched. For obvious safety reasons I still work with protective contact. A. is allowed to kick the pool noodle in case I go too fast and nobody will get hurt.

Introducing the Pool Noodle

I already knew A.’s favourite spots to scratch her, so I kept those in mind while training.

I introduced the pool noodle by holding it in front of her and click and treat her for looking at it. I am still working with protective contact (a barrier between her and me). She wouldn’t touch the target in the beginning.

Then I held it a bit more to the left on my side of the fence, still not too close, and clicked and reinforced A. for ‘standing still’. Then I held it a bit more to the right, near her withers and so on. Clicking and reinforcing every little step in order to give her confidence that standing still is what I want from her. Nothing else.

Little by little I could hold the target closer and closer until she could touch it. I haven’t clicked and reinforced much for touching with her nose or sniffing since my goal is not to teach her to touch the pool noodle with her nose. She wasn’t afraid of the pool noodle target by the way, just curious.

Training logbook

_Husbandry skill_hoof care_hippoLogic

After 3 sessions of each 5 minutes I could touch her with the pool noodle on the withers, her chest/throat/mane and her bum. If she moved away, even a little weight shift, I went back to the previous steps when she was still relaxed and OK with it. I would take a step back and continue a bit slower. In positive reinforcement training you mark the desired behaviour. If A. wants to move away that is OK. I just wait until she is ready to come to me and present her body close to the fence so I could touch her with the pool noodle again.

I don’t keep the pool noodle on her body until she stops moving. That would be negative reinforcement (strengthening the behaviour (standing still) with taking away the aversive (the thing she wants to escape).

I know it took 3 sessions because I keep a training logbook. I keep track of time, how many sessions we do each day, how long the sessions are, how long the breaks are (usually 2-3 minutes), where we train (A. lives in an in/out stall and sometimes we train outside, sometimes inside) and how much progression we made and also what startled her or what body parts he becomes anxious. I also wrote down the next steps of her training.

I end every session with an end of training signal. Sometimes A. keeps standing aligned to the fence in the hope of getting scratches, sometimes she walked right back to her hay to eat.

In the next blog I will tell you more about how A.’s training is progressing.

Read the previous blog: Husbandry skills: hoof care (part I)

Sandra Poppema, B.Sc.
Are you inspired and interested in personal coaching or want to be a part of my HippoLogic Clicker Training Academy in which we have weekly group clicker coaching, clicker courses and a private online R+ community take action! CLICK the links to learn more.
Hoof care, teach your horse to lift up his feet (part I)

How to teach your horse to lift his legs. so you can feel safe cleaning his feet.

  1. Encourage your horse to do a weight shift. Reward taking off weight of his leg with a click and treat
  2. Reinforce lifting the leg up
  3. Support the leg, without holding onto it
  4. Guide the leg down
  5. Build on duration and keeping his foot up in the air
  6. Add your cue
  7. Fade out clicks and treats
  8. Train the next leg

What are Husbandry Skills?

The term ‘husbandry skills’ refers to all the behaviours you want to teach an animal in order to take care of them safely. Daily  husbandry skills are haltering, leading, grooming, cleaning hooves, cleaning nostrils, eyes and ears and so on. Medical procedures like drawing blood (important in zoo animals) or administering medication (injections, oral medication, ointments) are also a part of husbandry skills.

In this blog series I will share with you how I train a young horse to lift her legs for hoof care with positive reinforcement (clicker training).

Young horses

Preparing for a hoof stand by HippoLogic
Preparing for a hoof stand.

At the SPCA barn I ‘m training a young horse to lift her legs for hoof care and trims.

The farrier did a good job last time, but his time was limited to do the trim due to the horse.

The mare was very scared and stressed. She is not yet properly trained to lift legs and let us clean her hoofs, let alone lift her legs long enough for a trim.

My goal is to have her much better prepared for a trim next time. I would like her to lift her legs on cue and hold her legs up herself (no leaning into the farrier). I want her to be confident and stress free during a trim.

Building a relationship and trust first

This horse, let’s call her A. is young and she is really scared to be touched, especially on her legs. I introduced myself to her with offering scratches over the fence. She is really itchy at the moment due to shedding, so scratches are a good reinforcer to her right now. The best way to start a relationship is to start giving.

Protective contact

In a few sessions A. figured out how to ‘call me over’ (Starter button) so I would scratch her: if she aligns herself with the fence I come over and scratch her. I started with her chest area, now A. also let me scratch her withers, under her mane, her chest and her bum.

She knows that she can walk away and I don’t (can’t) follow her. She is in control: she can tell me where I need to scratch her and for how long. She even is in control of how much pressure she likes in a certain spot by pushing more or less into my hand.

End of Session signal

I taught her the end of session signal: I show her my two empty hands and say ‘All done‘.  It is interesting to see that she now immediately goes back to her hay if I give her my end of session signal. She knows the reinforcers (attention, scratches) will stop now.

I find it very important to have a way to communicate to the horse when and when not to expect reinforcers from me. It helps prevent mugging and turning your horse into a pushy horse.

Next step: introducing the clicker_hondenclicker

Now I have a bit of a positive relationship and established some rules (start session, end session, she learned that she can influence her training) and I can take her training to the next level: introducing the bridge or marker signal, the click.

I will keep you updated about A.’s training in the next blog.

Read more:

Husbandry skills: Hoof Care (part II)
Prepare your Horse for the Farrier with Clicker Training

Happy Horse training!
Sandra Poppema, B.Sc., founder of HippoLogic

Are you inspired and interested in personal coaching in a group or do you want to have access to online clicker training courses and a fabulous, supportive R+ community, then join our HippoLogic Clicker Training Academy. Apply today!